This single page demonstration web app provides services that enable you to maintain sensitive data like passwords securely in your browser and save the results in an encrypted remote DropBox file or, by cutting and pasting the encrypted data into a text editor and saving it in a local file.
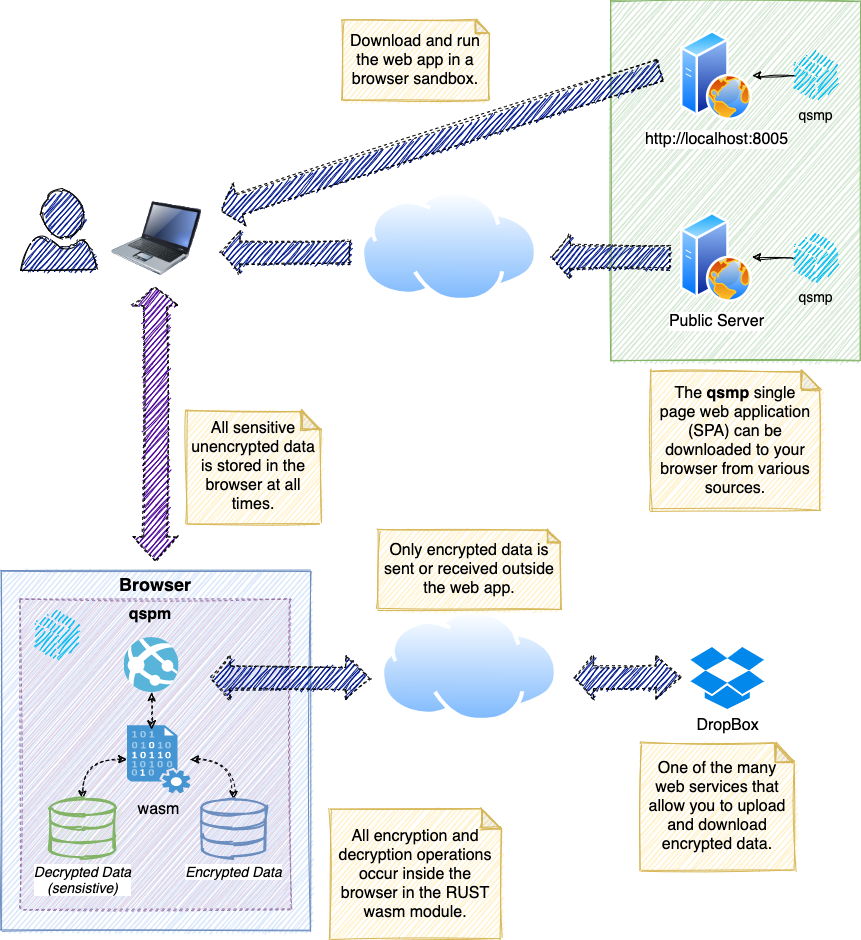
The flow looks like this:
The key feature of this system is that data is encrypted and decrypted locally in your browser sandbox using a Rust based wasm (WebAssembly) module that implements the AES256-GCM encryption algorithm. That is a symmetric key algorithm that is judged to be quantum safe and is quite fast because it is implemented in wasm.
What this means is that your data data is never transported in unencrypted form anywhere.
Contrast this approach with other services. Those services might transfer your unencrypted data to their server using TLS which is quite secure today but, in the future, may vulnerable to quantum attacks.
Furthermore, this system is open source so you can analyze the source code to find and fix security vulnerabilities.
There are other services that provide sensitive data management services but some of them are not open source so it is difficult to determine how vulnerable they are to quantum and traditional attacks.
And finally, you have complete control over your encrypted data. You can store it DropBox, a local file or wherever else you want.
It is often the case that other services manage the data for the user which is perfectly fine but it is sometimes difficult to determine how well that service is protecting the data.
This webapp is available directly from https://esentire.github.io/qspm.
This single page web app can be installed without building anything. Simply download the qspm.zip file from the release page and extract to the location where it will be served.
To build this project from source you must have the following packages installed:
The steps are:
make serveHere is an example:
$ git clone https://github.com/eSentire/qspm.git
.
.
$ cd qspm
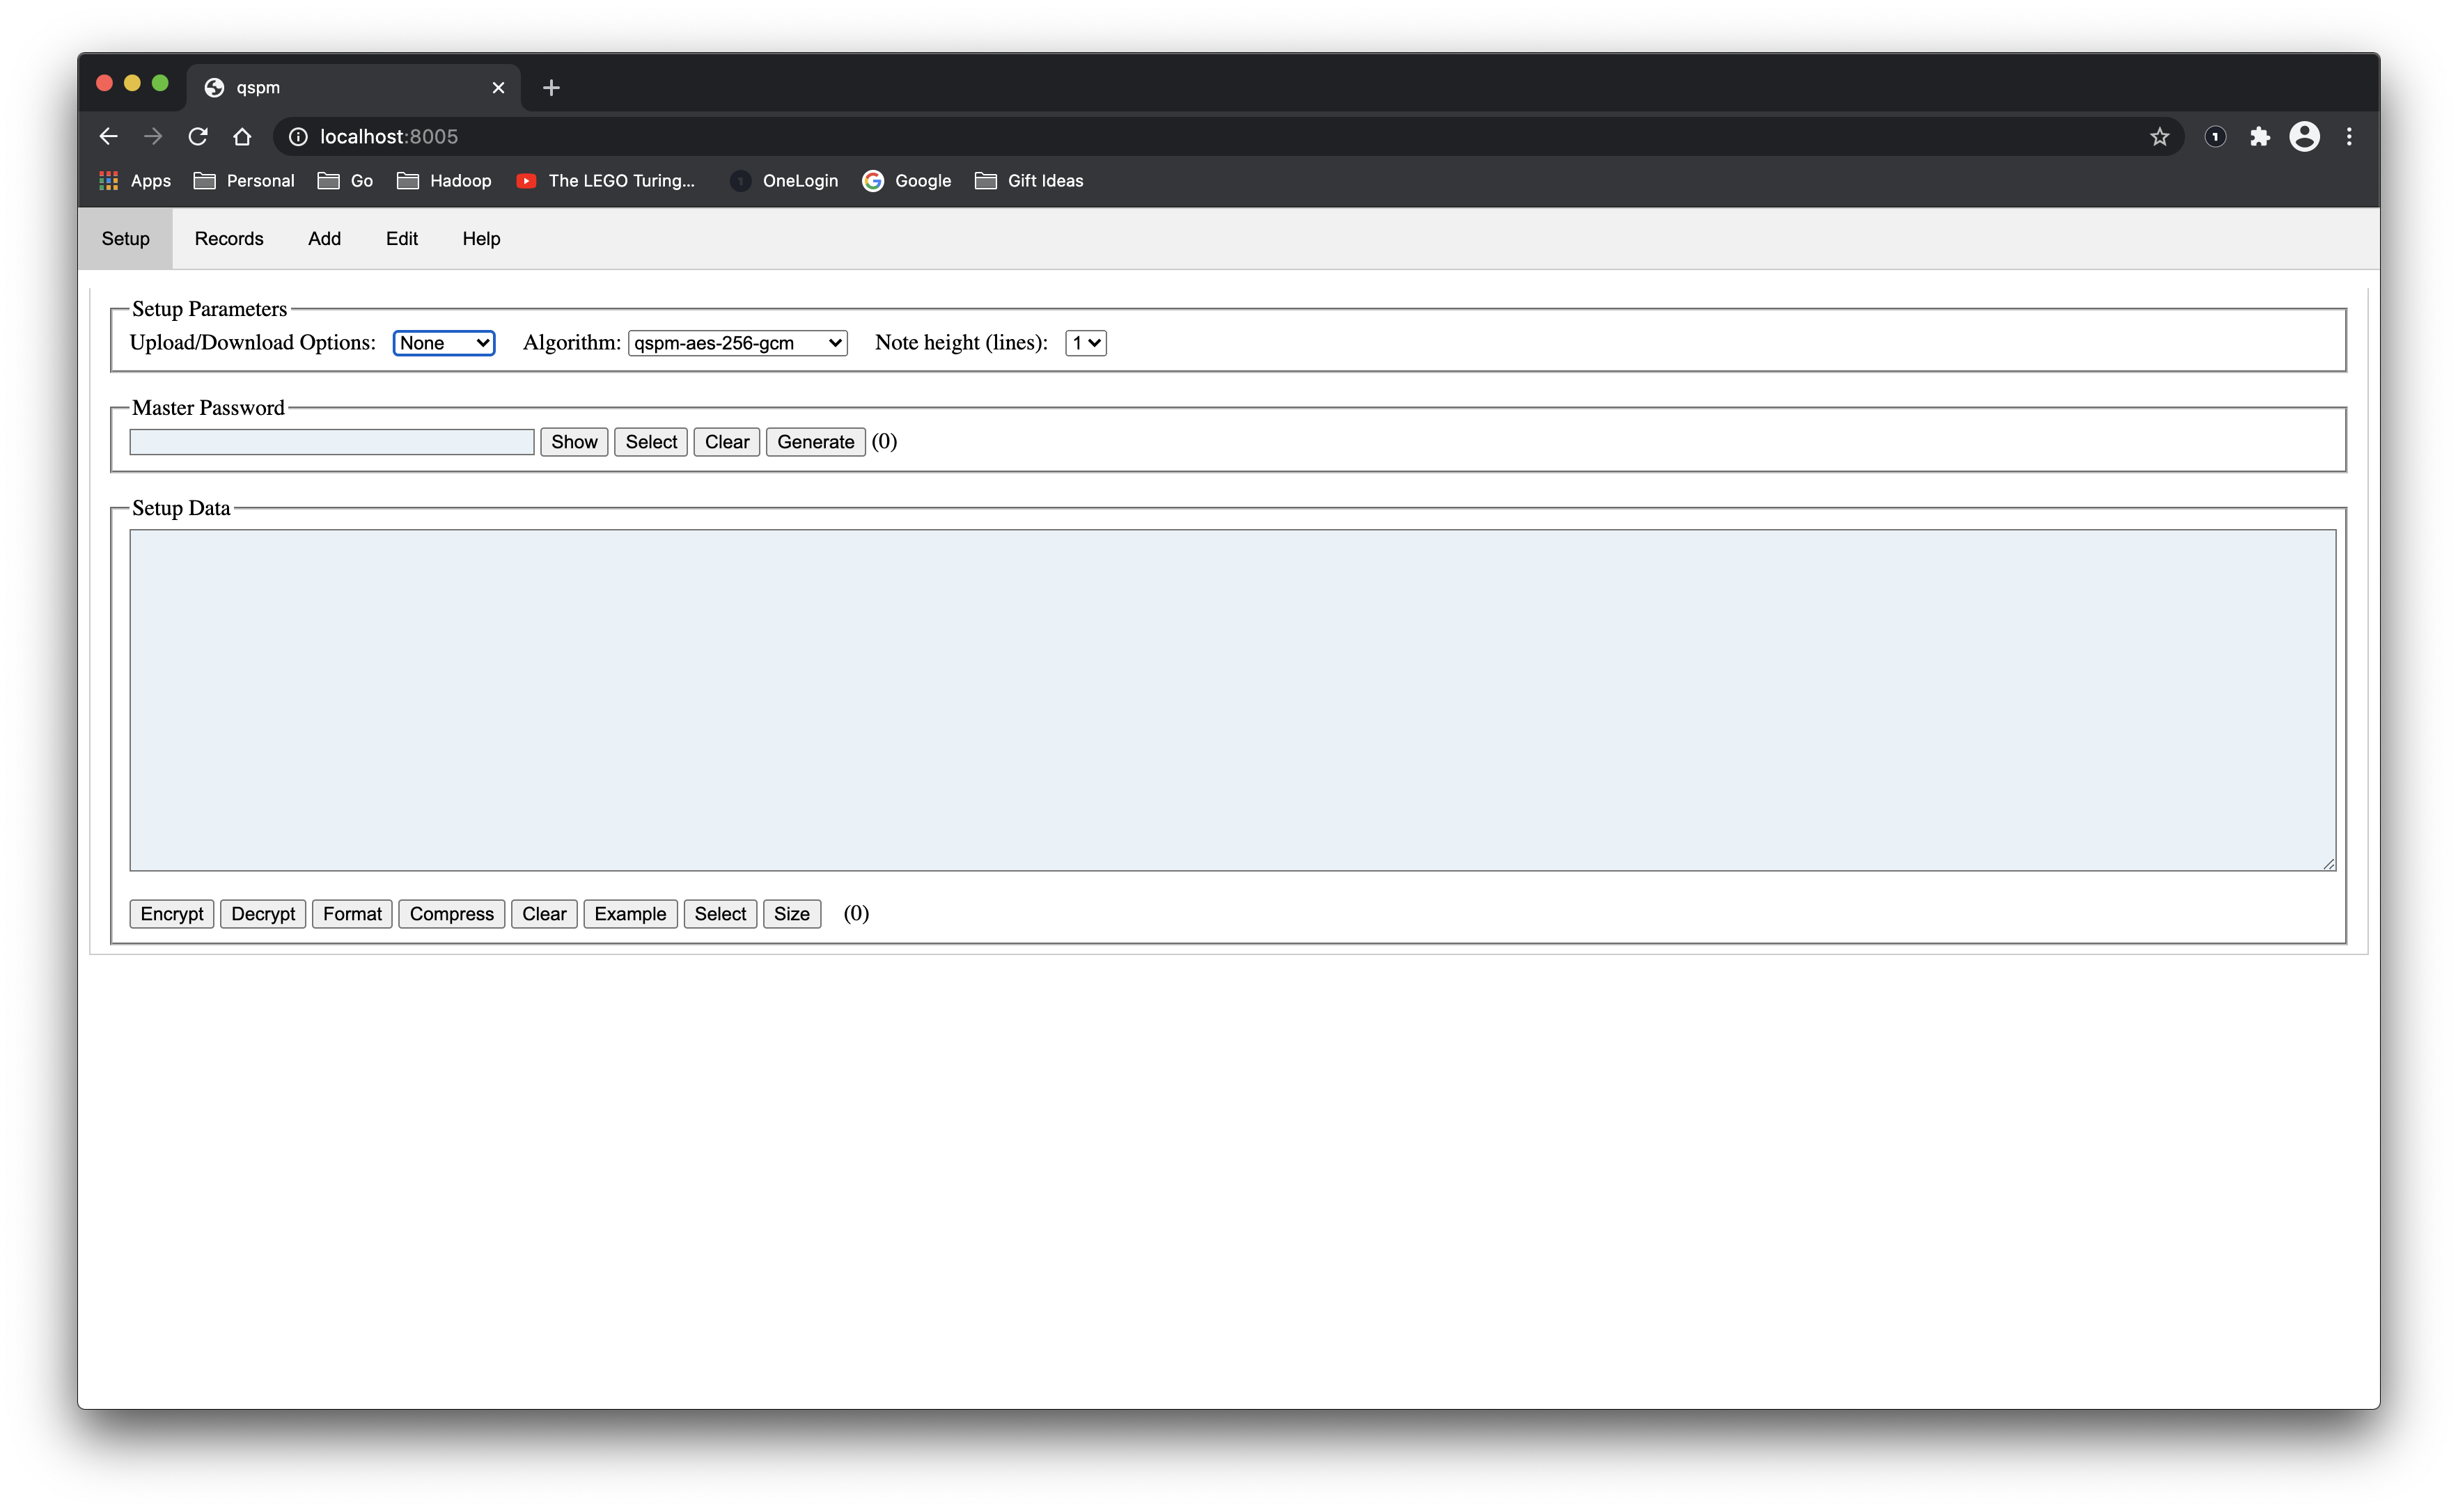
$ make serveIn about 10 minutes you will be able to navigate to the app at http://localhost:8005 where you will see something that looks like this.
There are two ways to use this system: from an internet server or from a local server running on your host.
If you are using an internet server, just navigate to the page and all is well.
If you want to run this system locally, you must start the system by running make serve in the project directory. This starts a server running on port 8005. Just navigate to http://localhost:8005 to start using it.
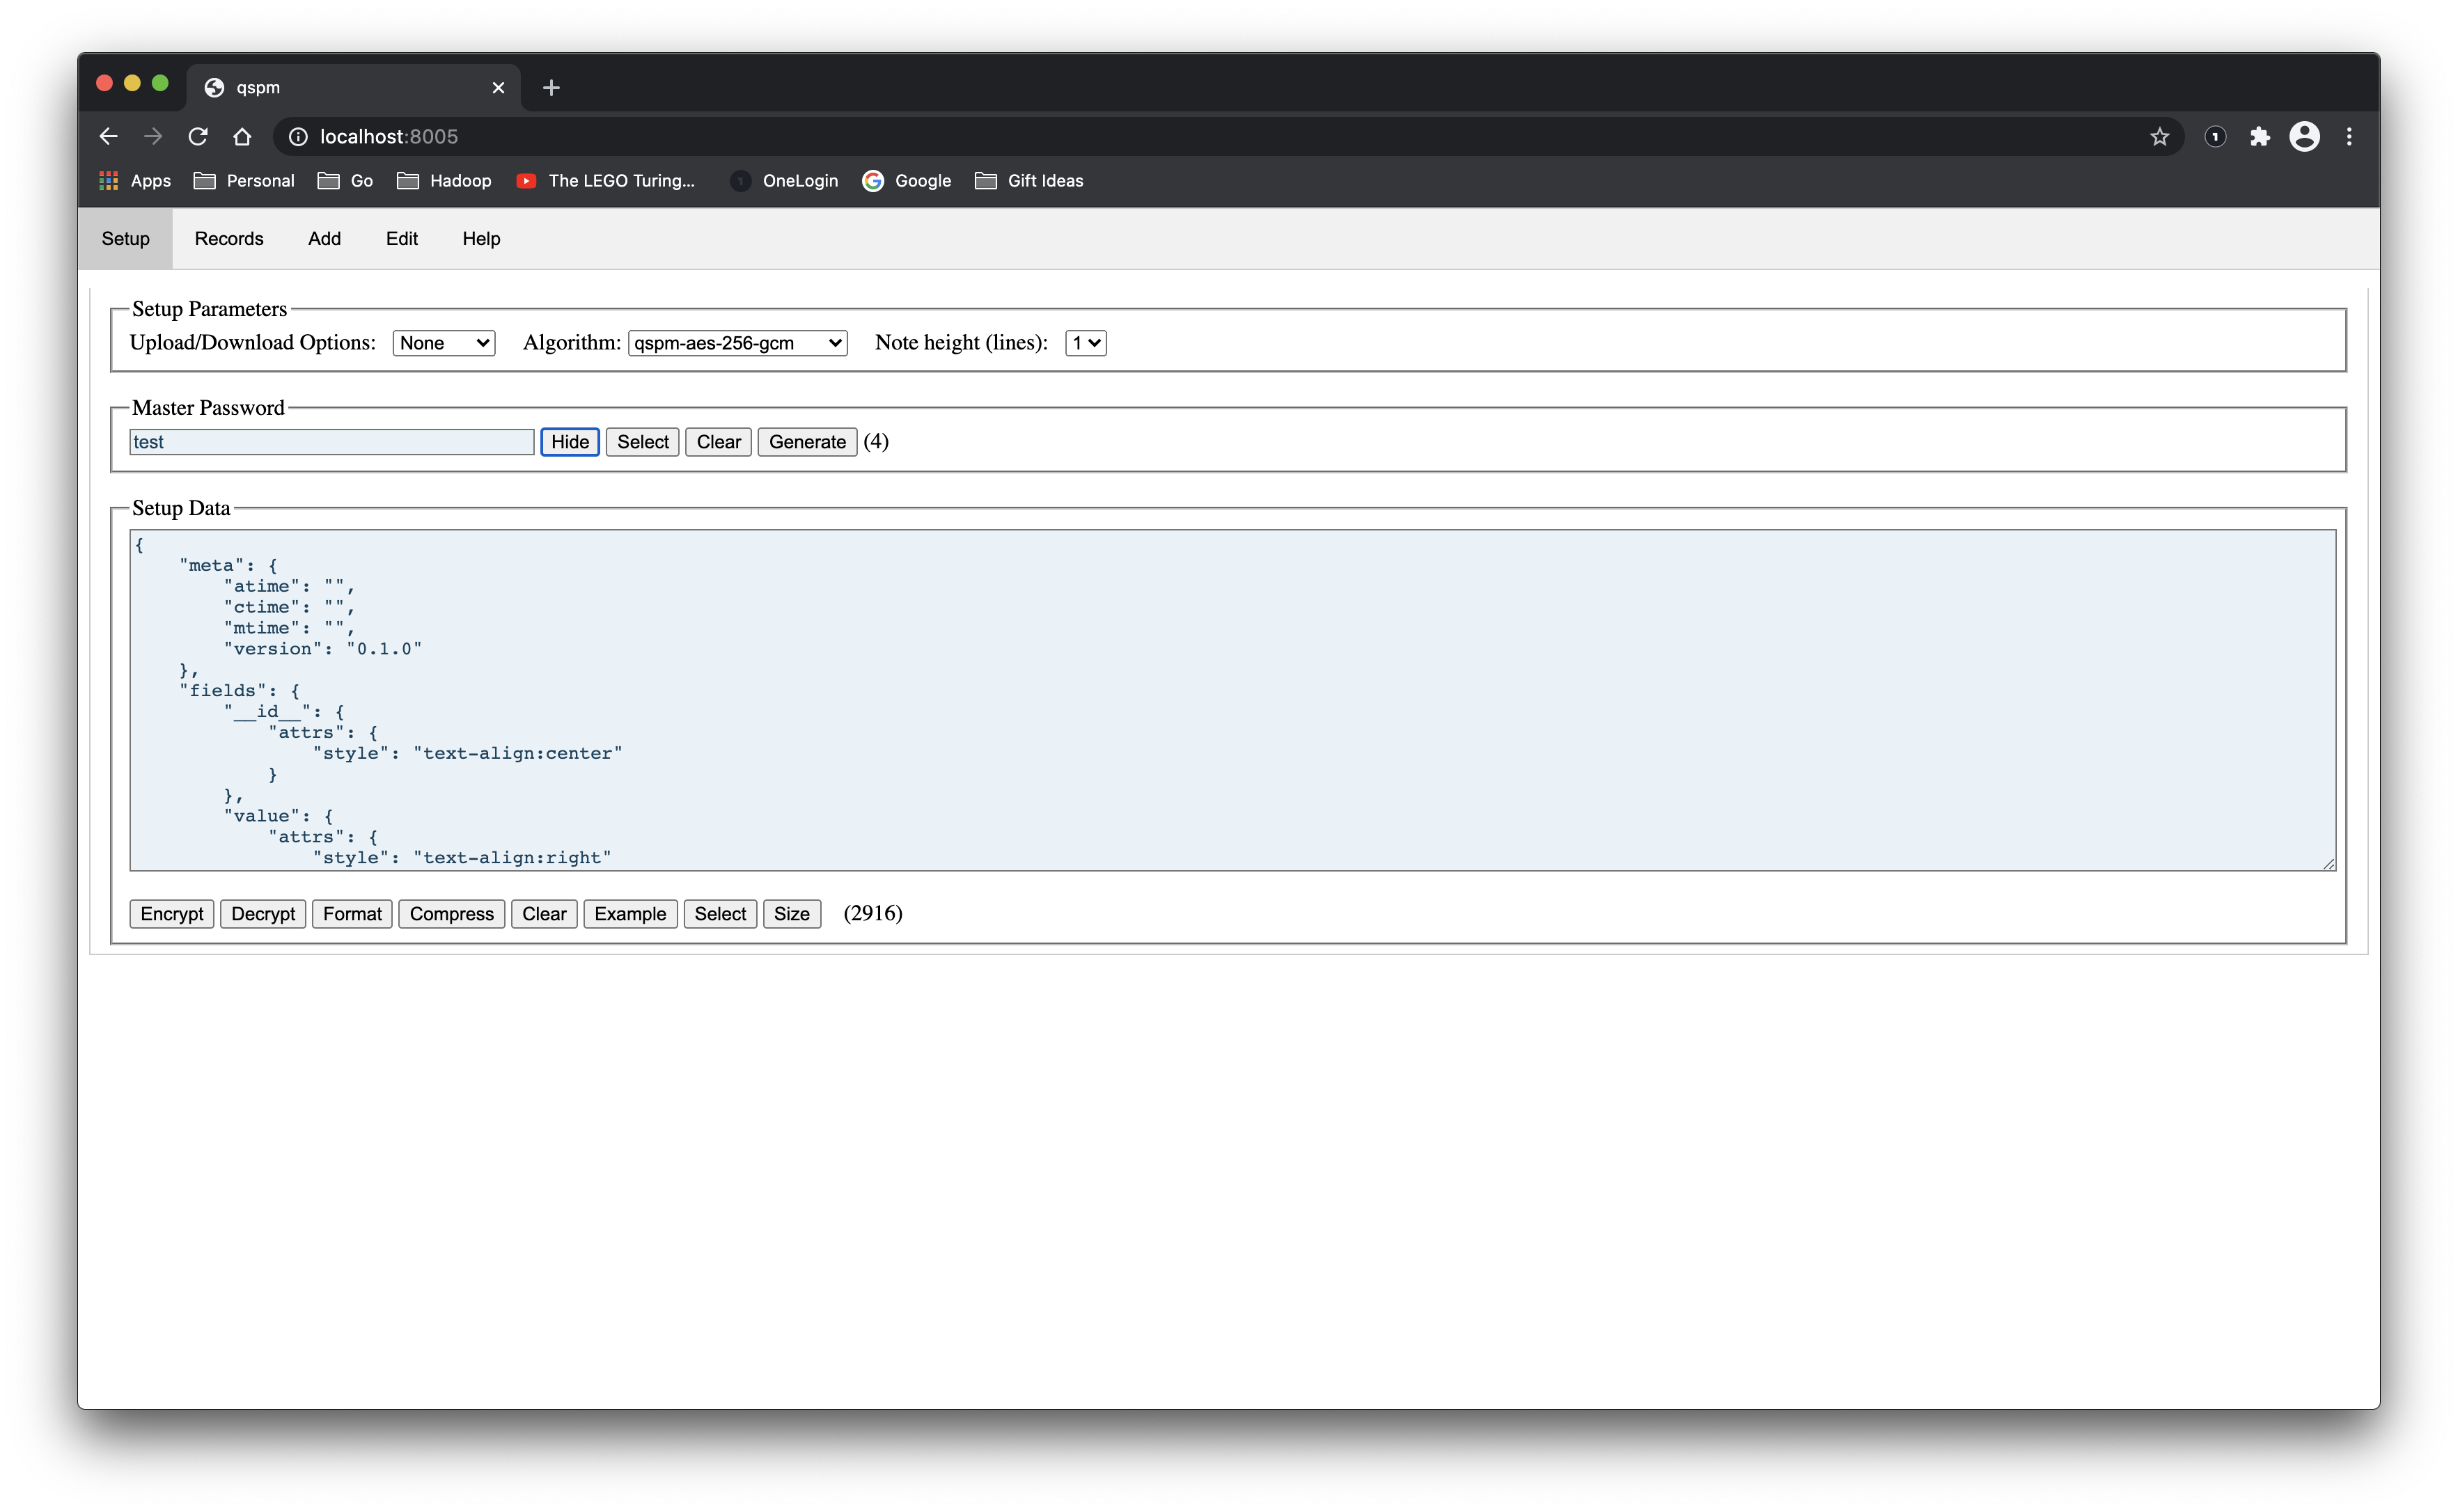
The first thing that you will want to do is create some data. One convenient way to do that is to navigate to the Raw tab, chose a master password and hit the Example button to generate some initial data.
There are four different options for doing uploads and downloads.
If you have a DropBox account, get a temporary token, encrypt the initial data and upload it to a file named something like data.txt so that you have a record of it.
Here is what the screen looks like after clicking the Example
button and typing the password (test
).
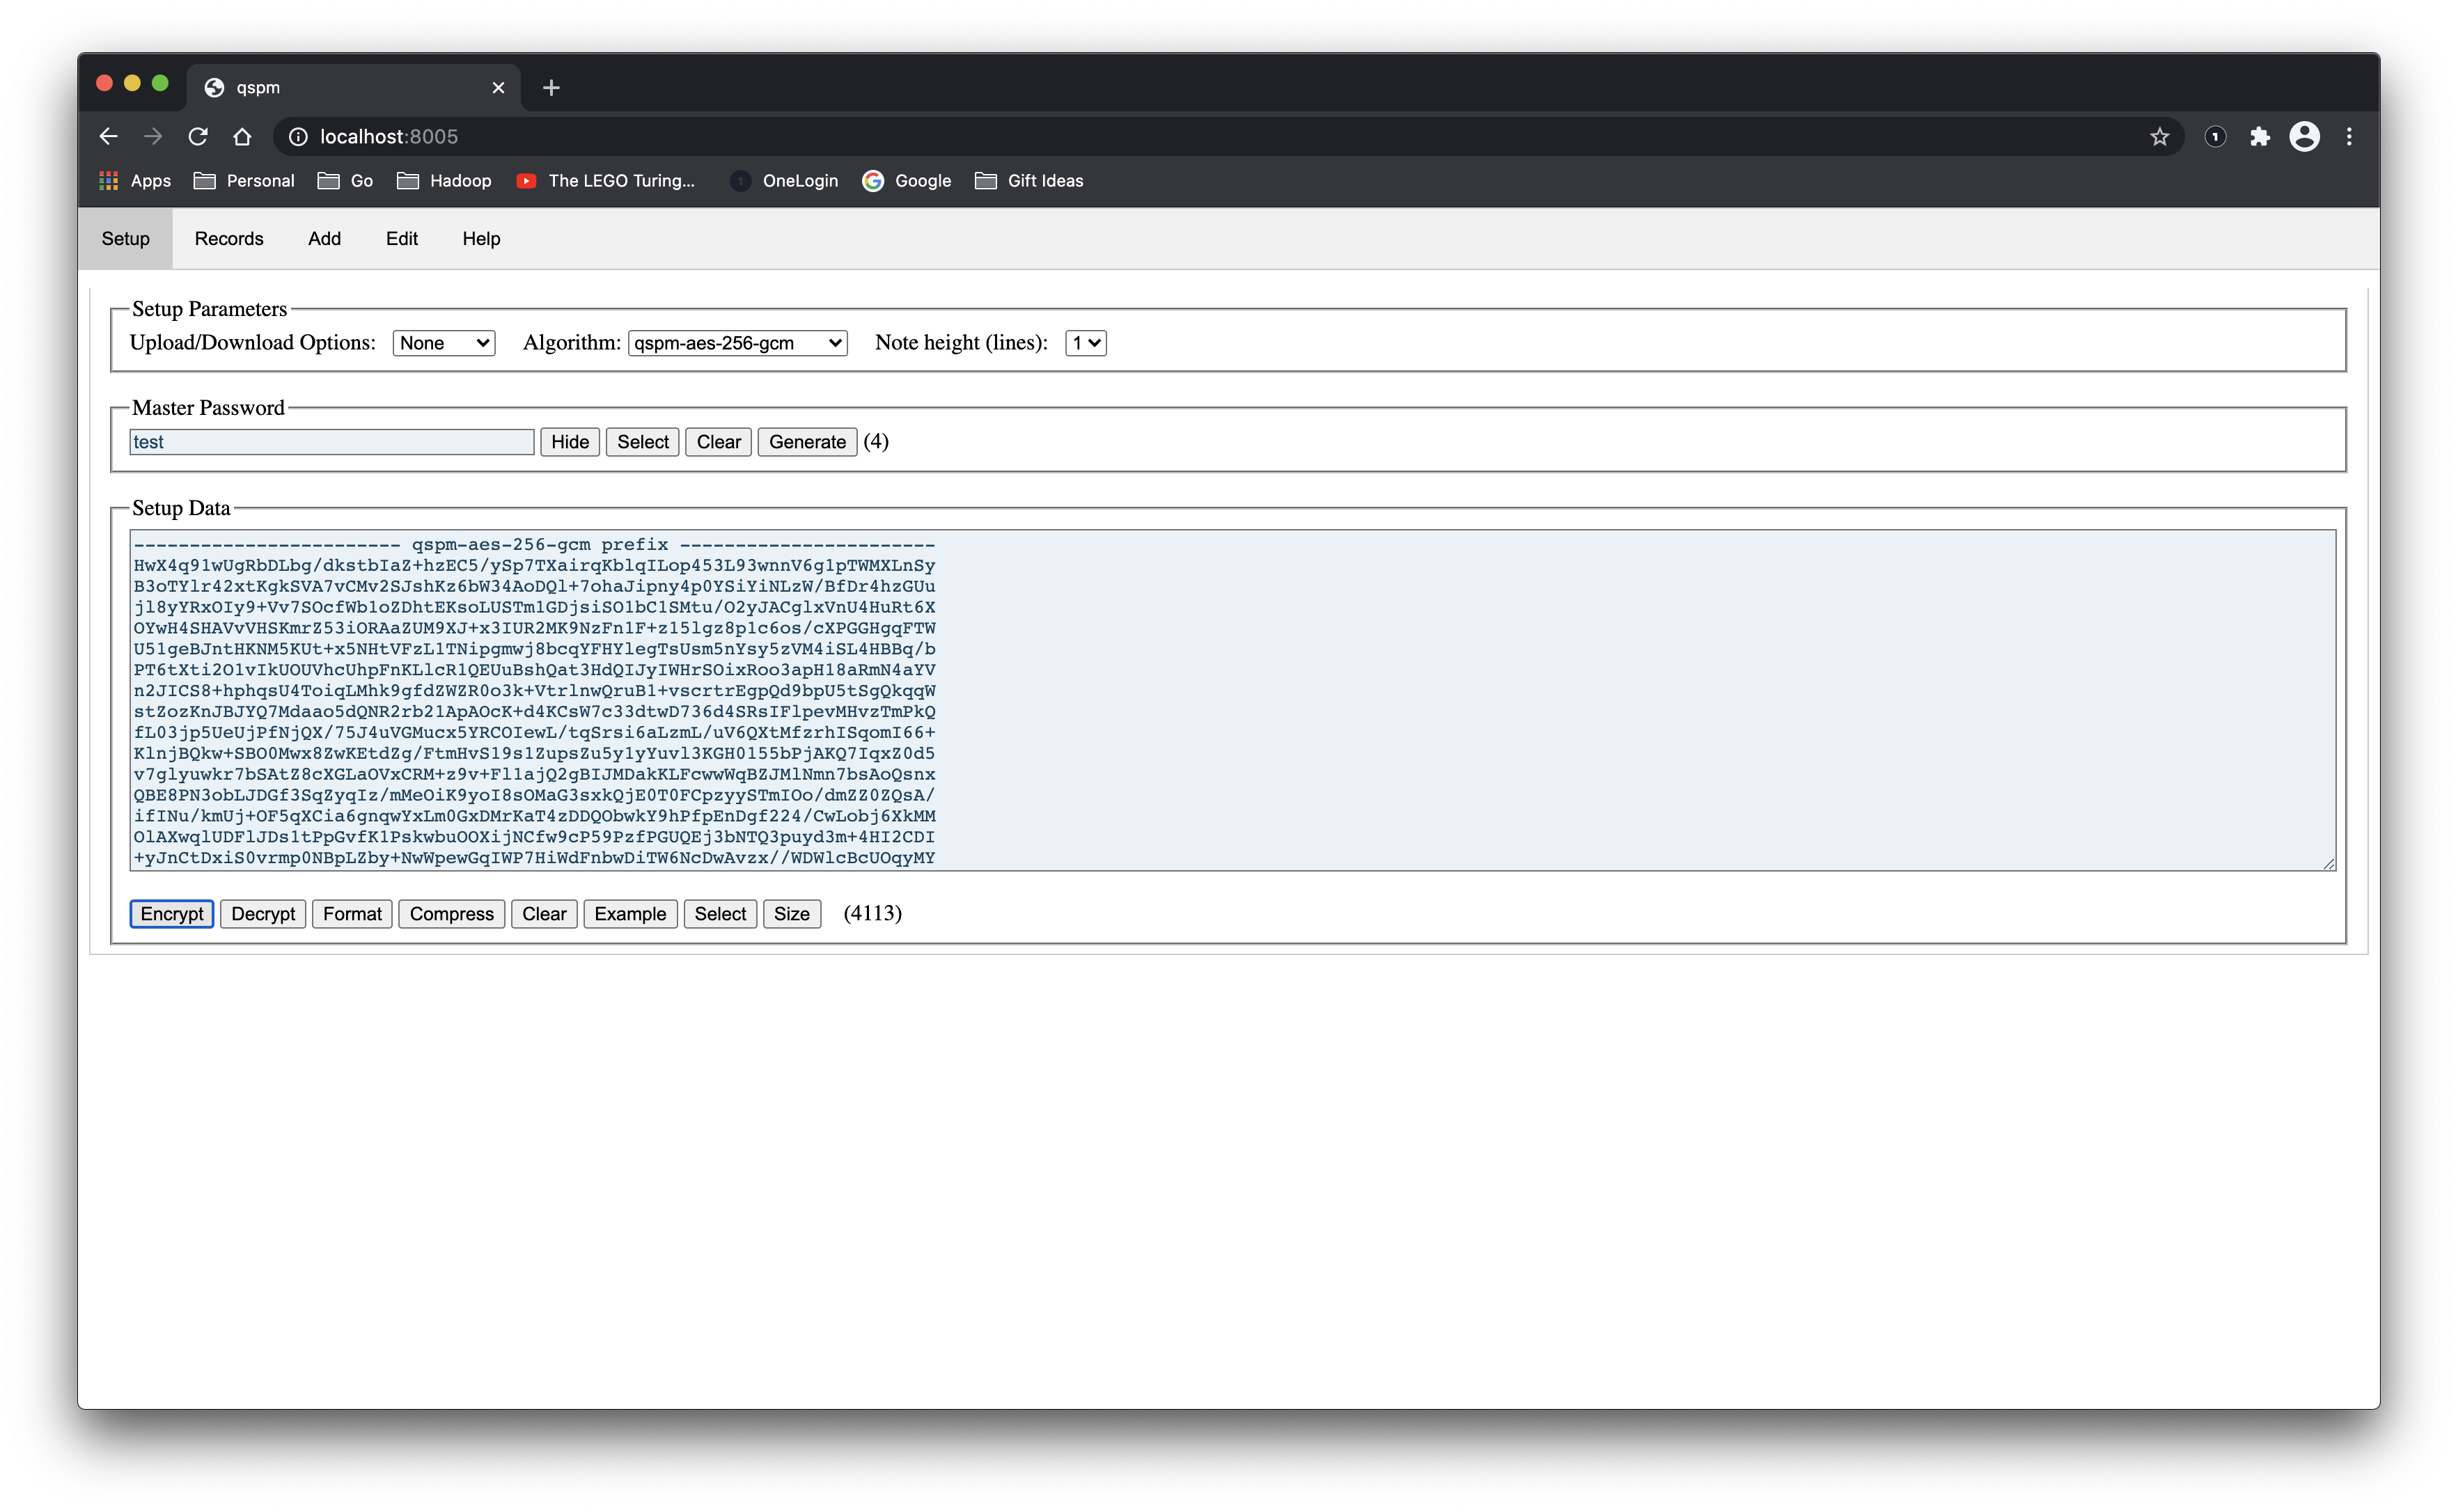
Here is what it looks like after you click the Encrypt
button.
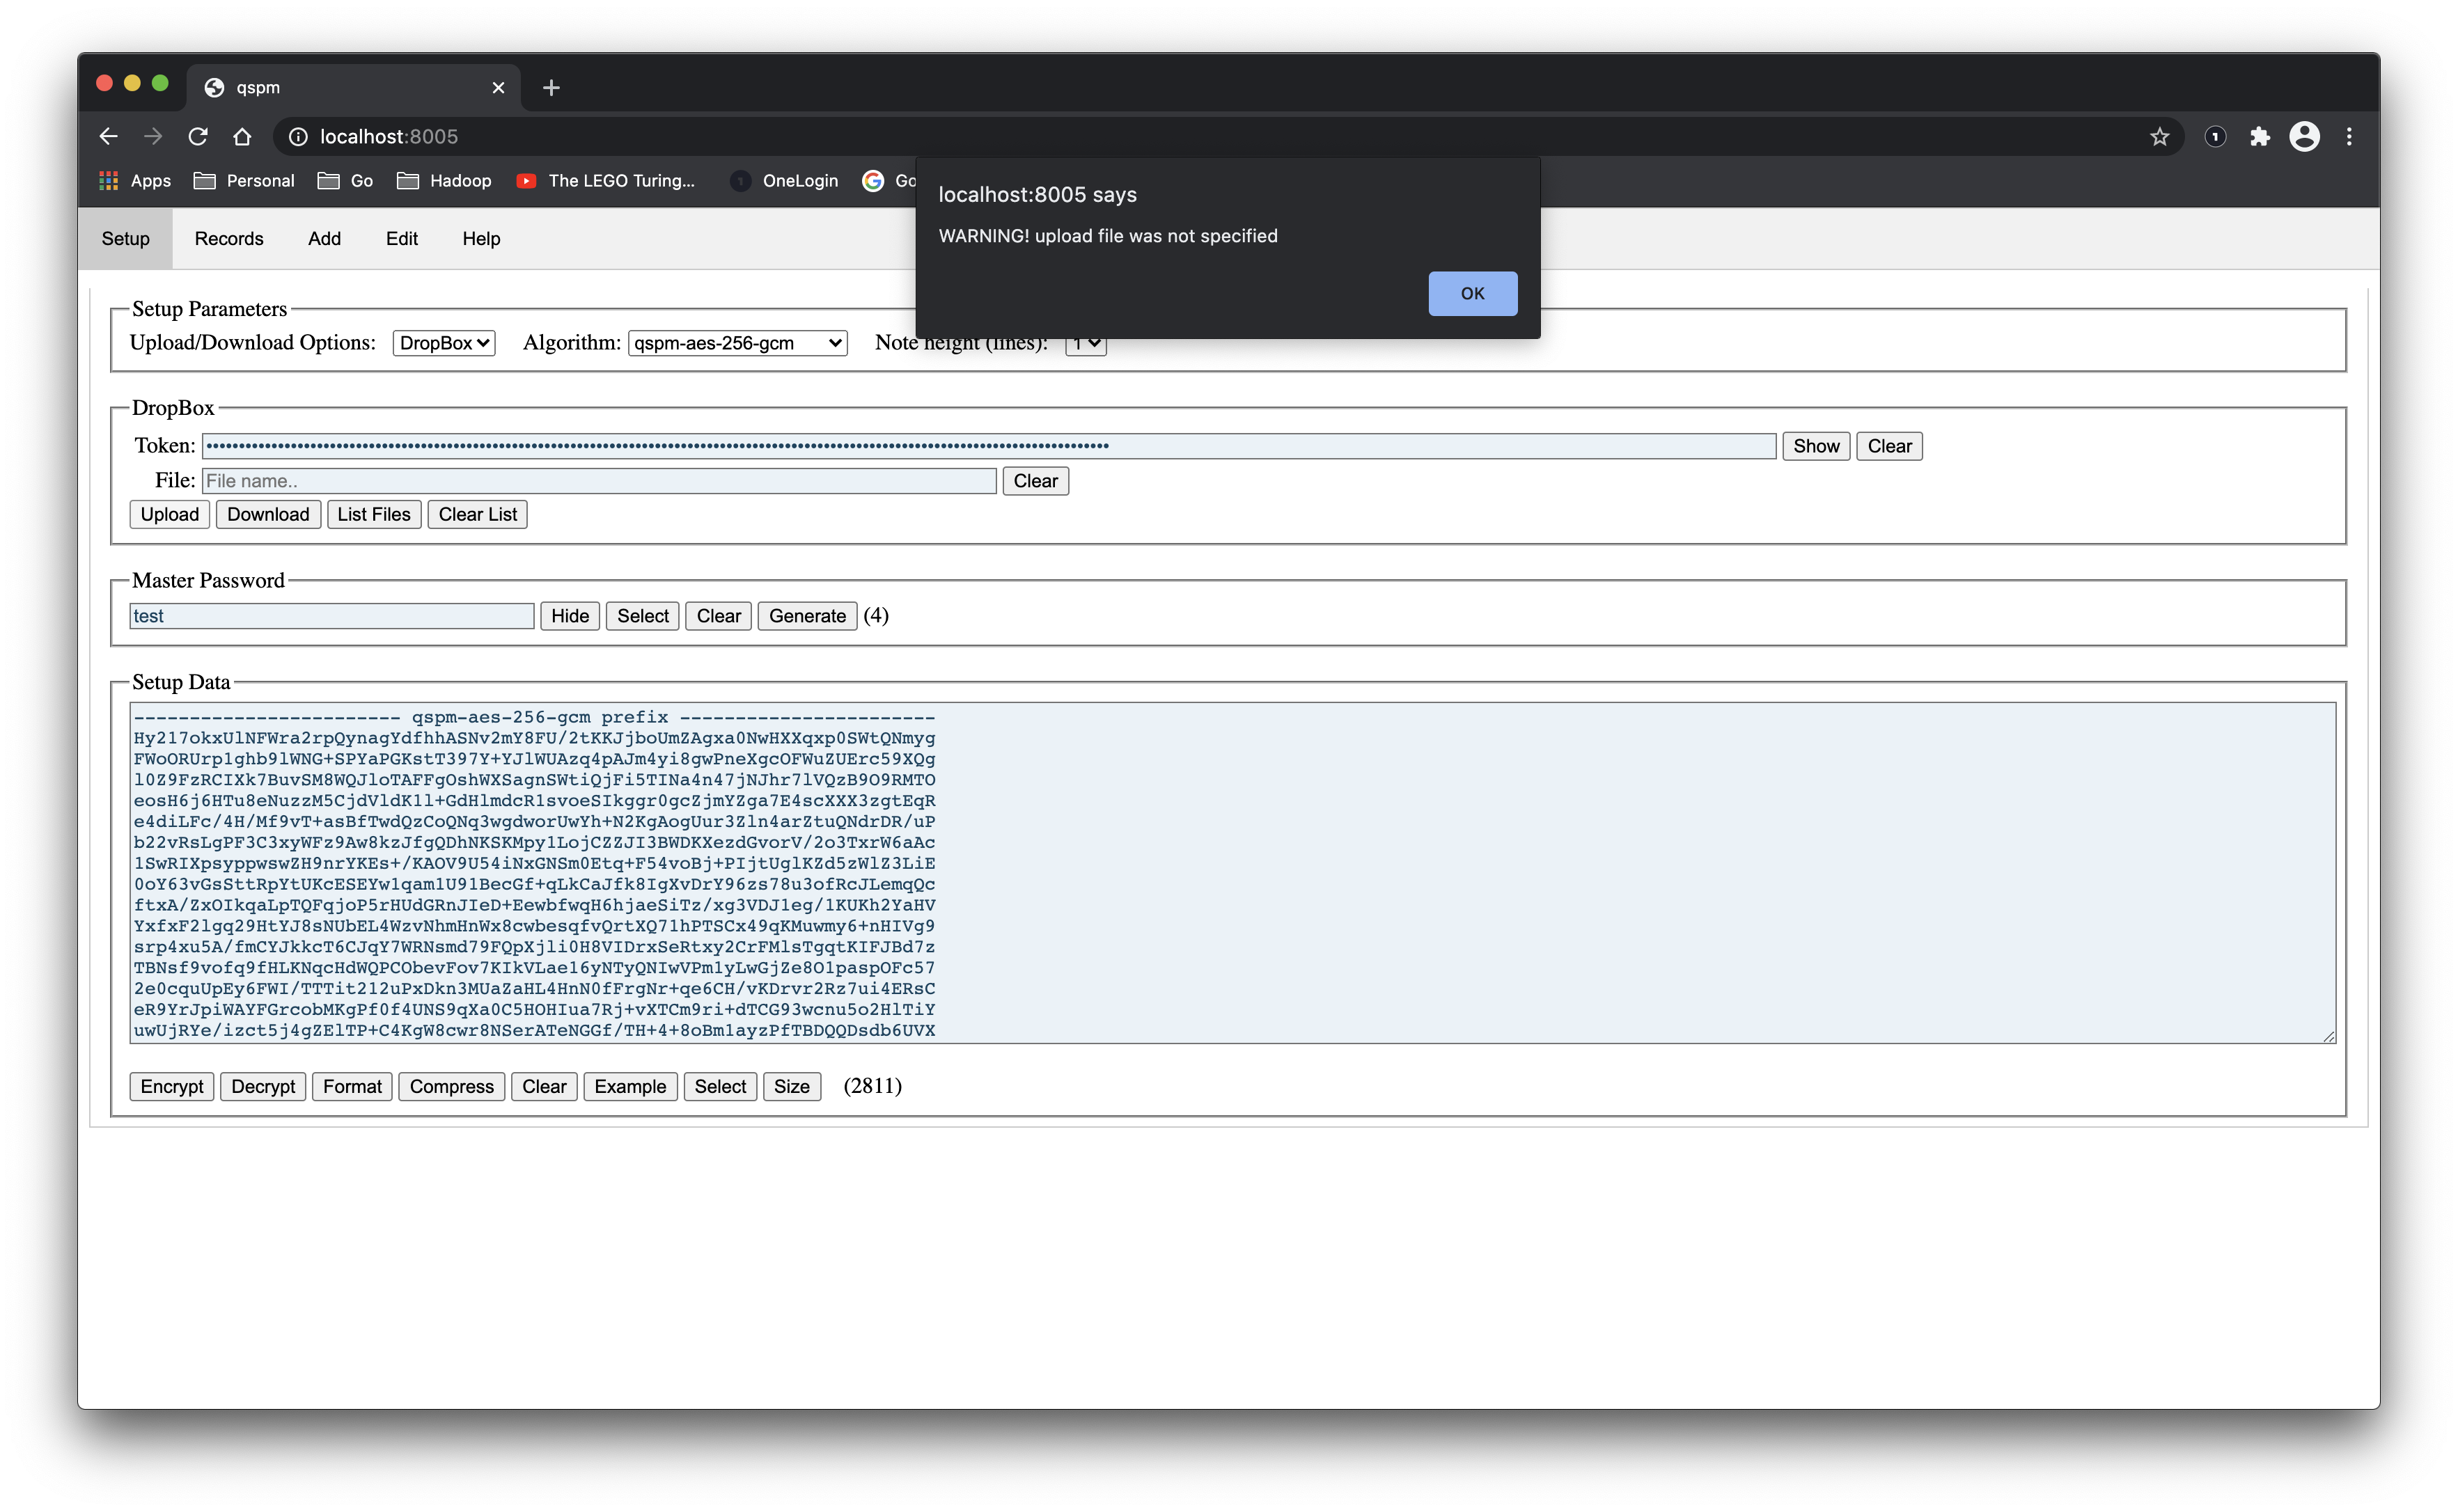
If you have a DropBox account, you can enter an access token and a file name (in this case example.txt
) and upload your file by clicking the Upload
button. Here is what it looks like:

When the upload completes, you will get a notification of success. If it fails with a 409 error, you forgot to enter the file name.
Now you can click the List Files
button and see it.
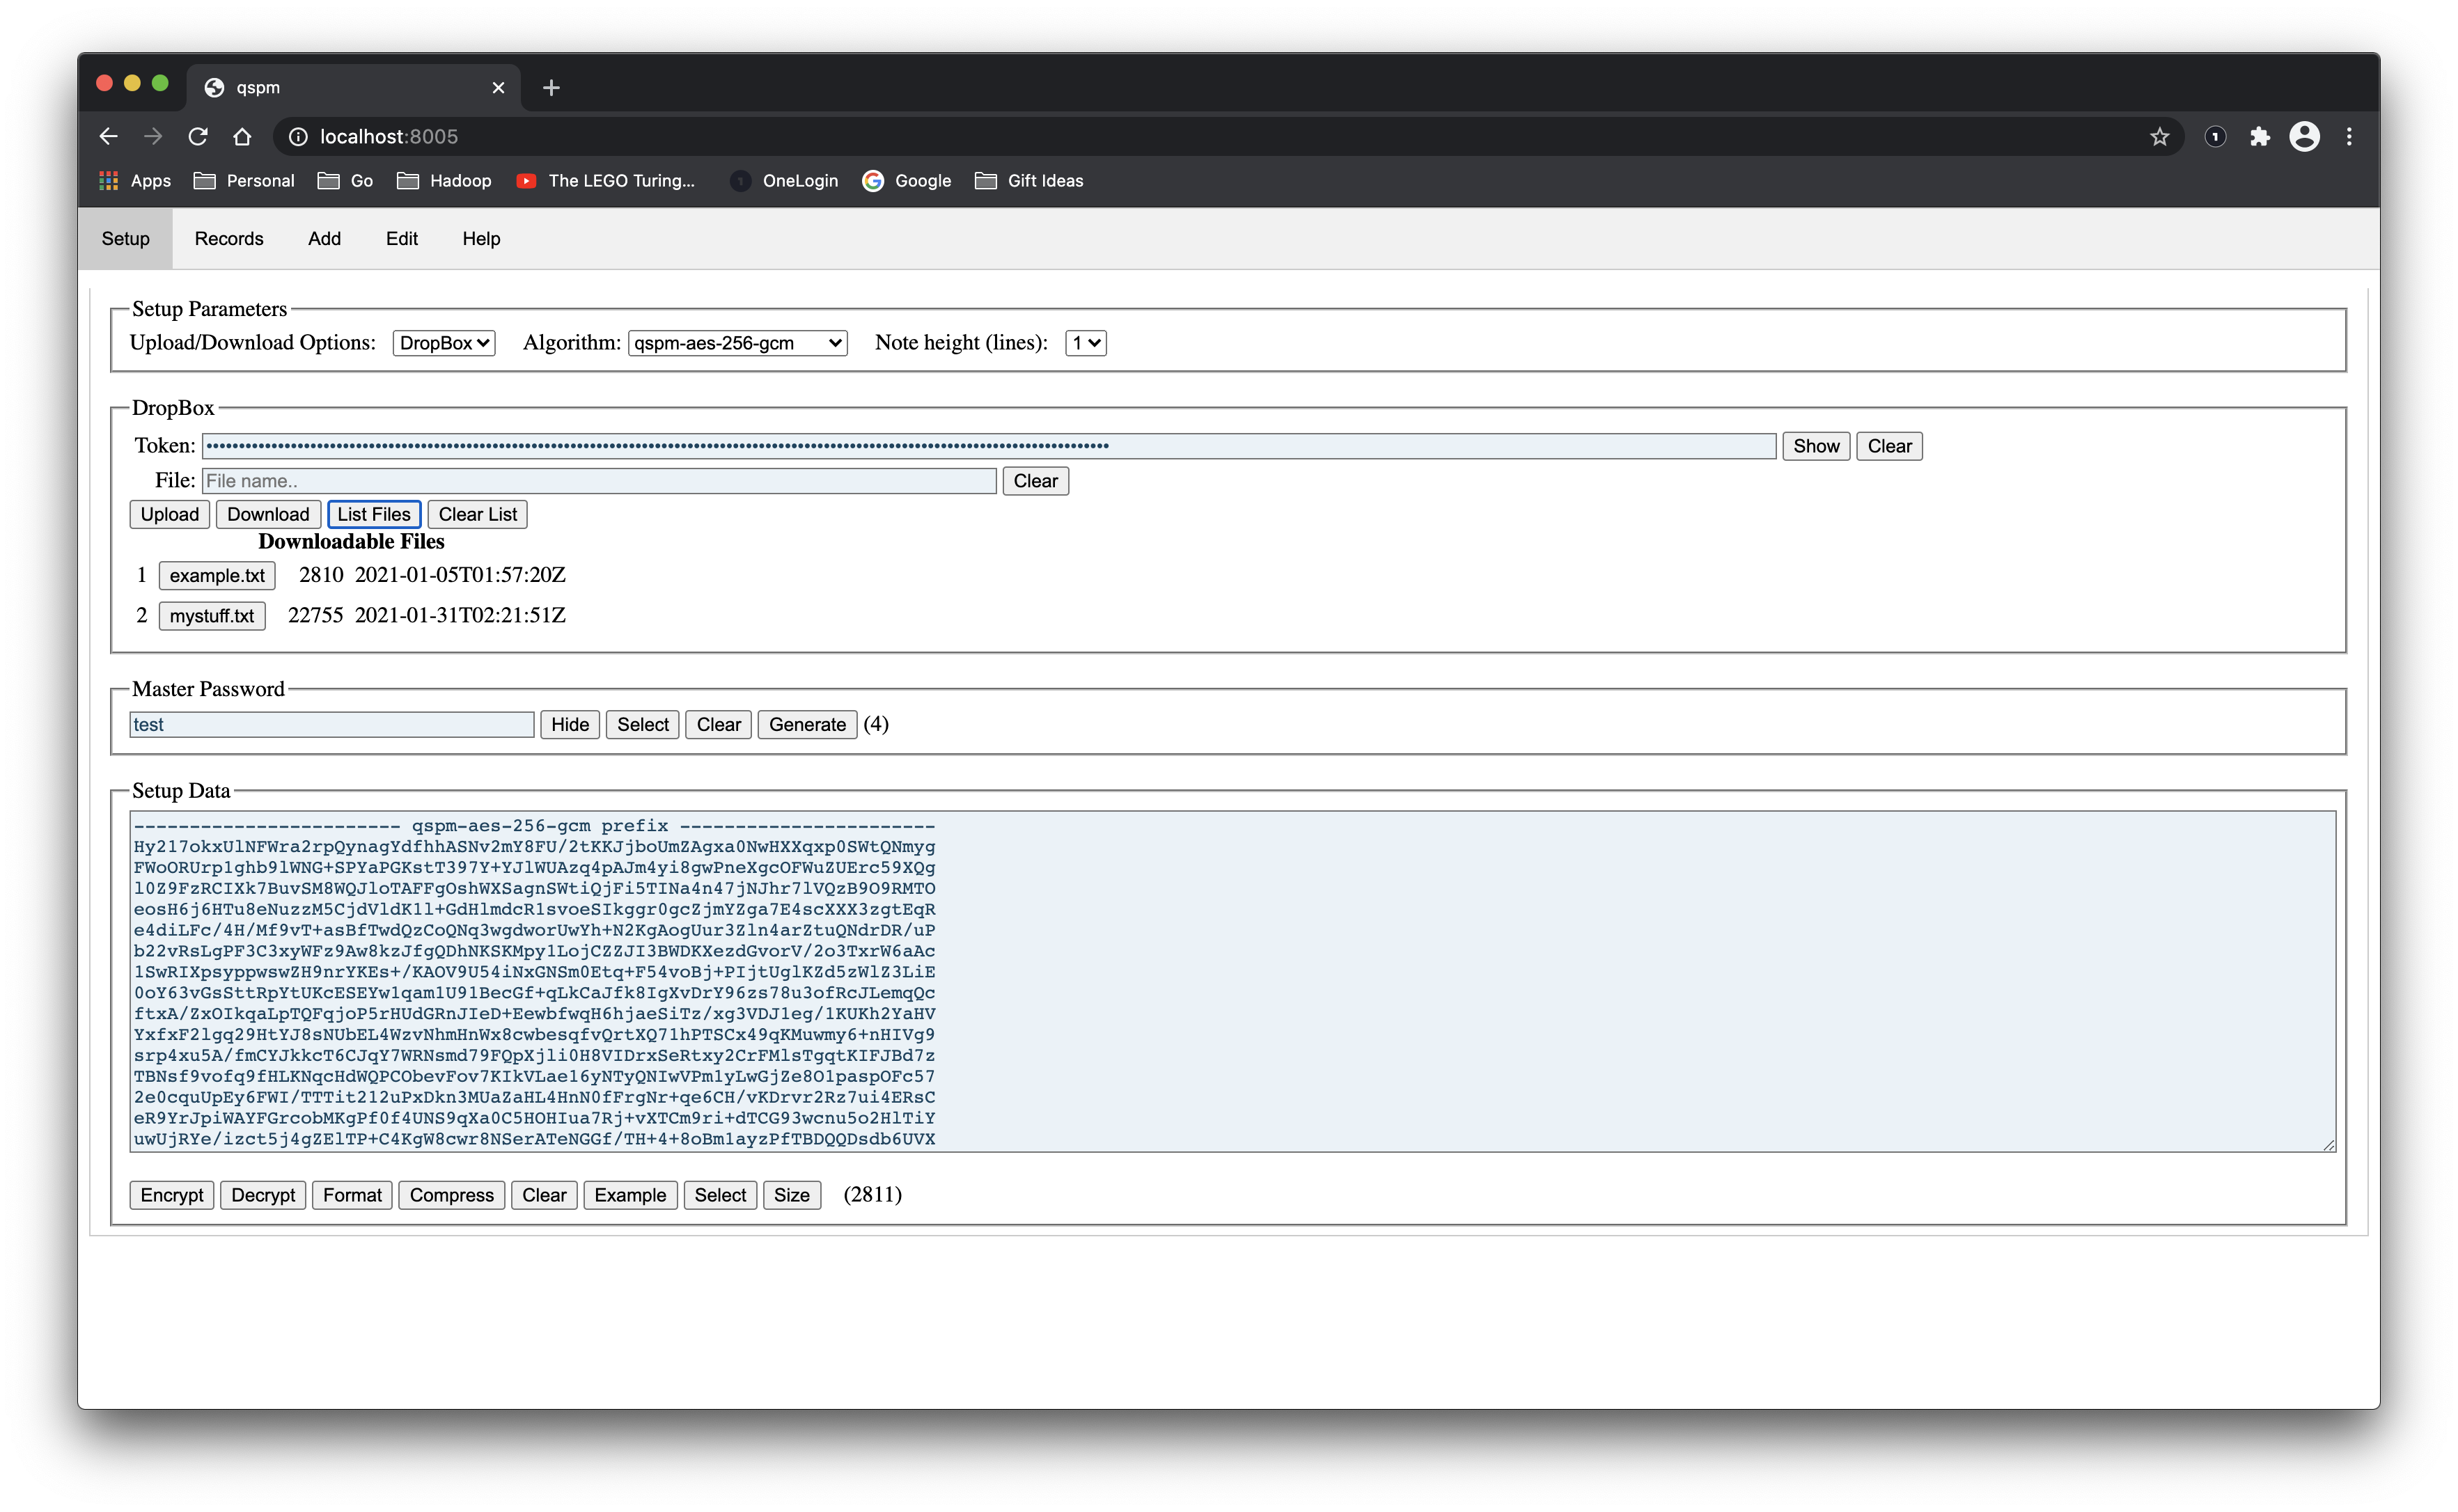
You can remove the list by typing the Clear List
button.
NOTE: you cannot delete files from this interface, you must go to your DropBox account to do that.
Once you have the hang of creating the data and doing uploads, go to the records tab and choose records to edit.
There is another option available for downloading local files: Download Local File
. This allows you to download files that were saved locally.
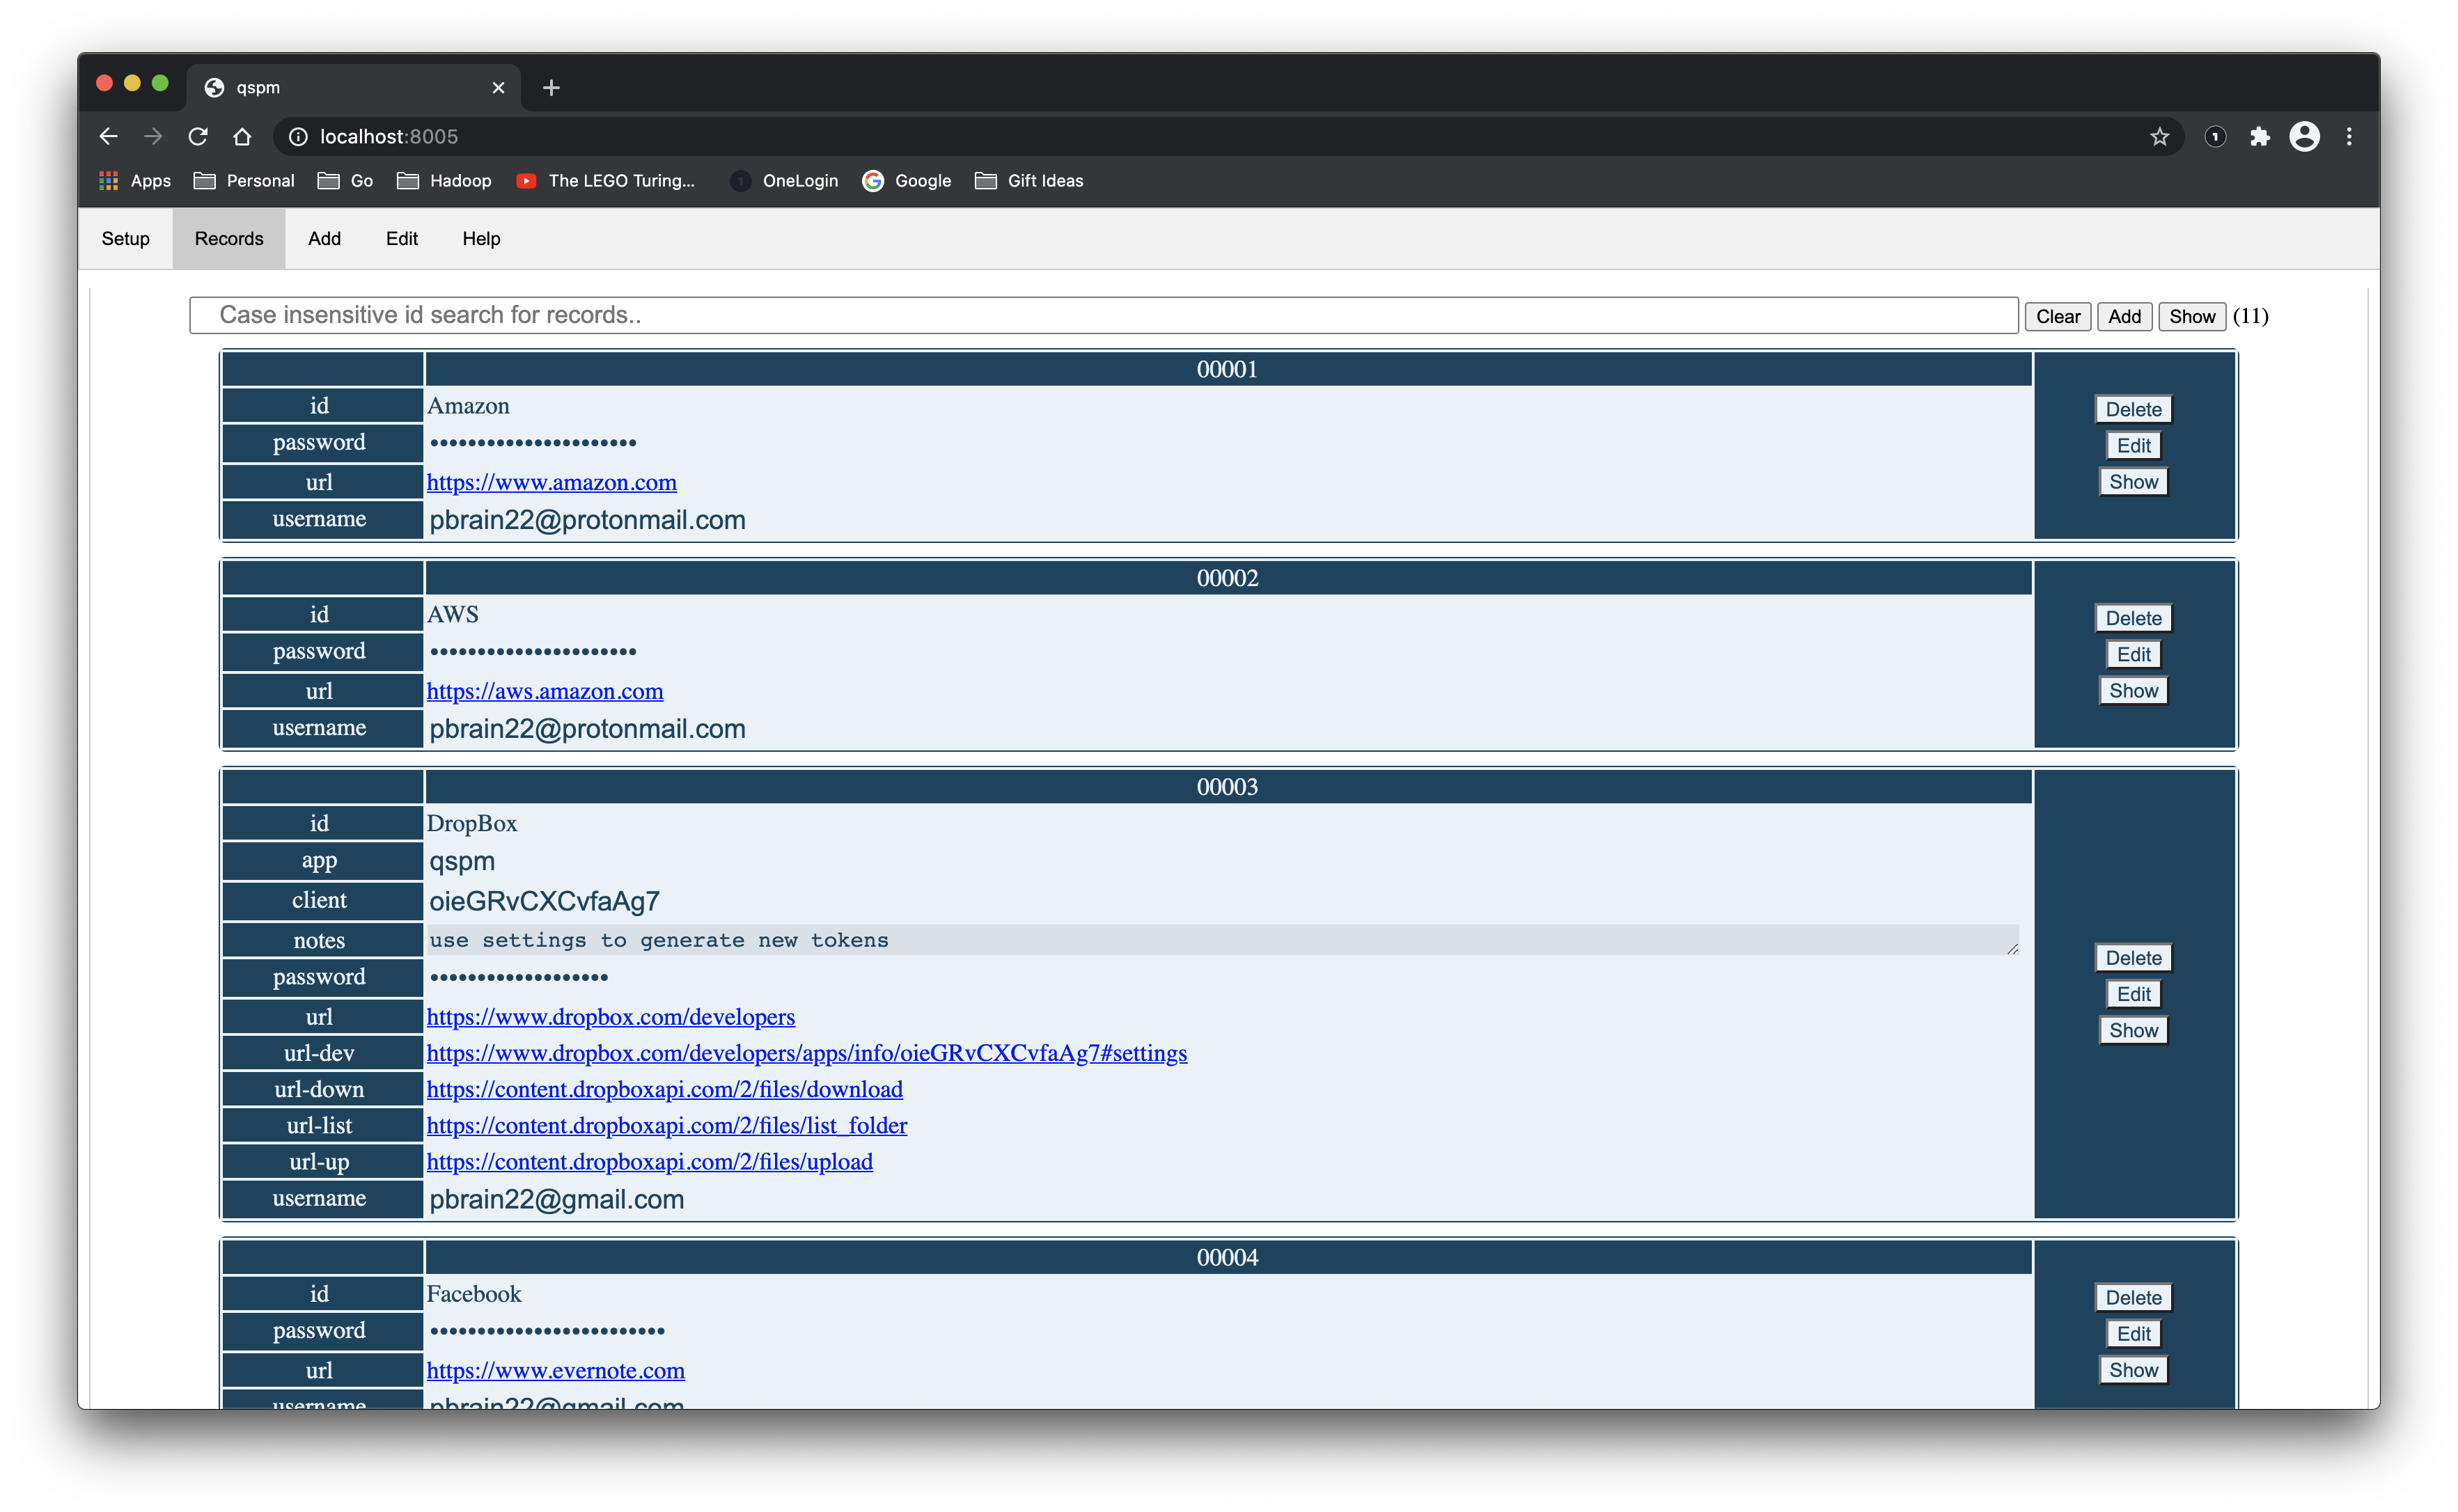
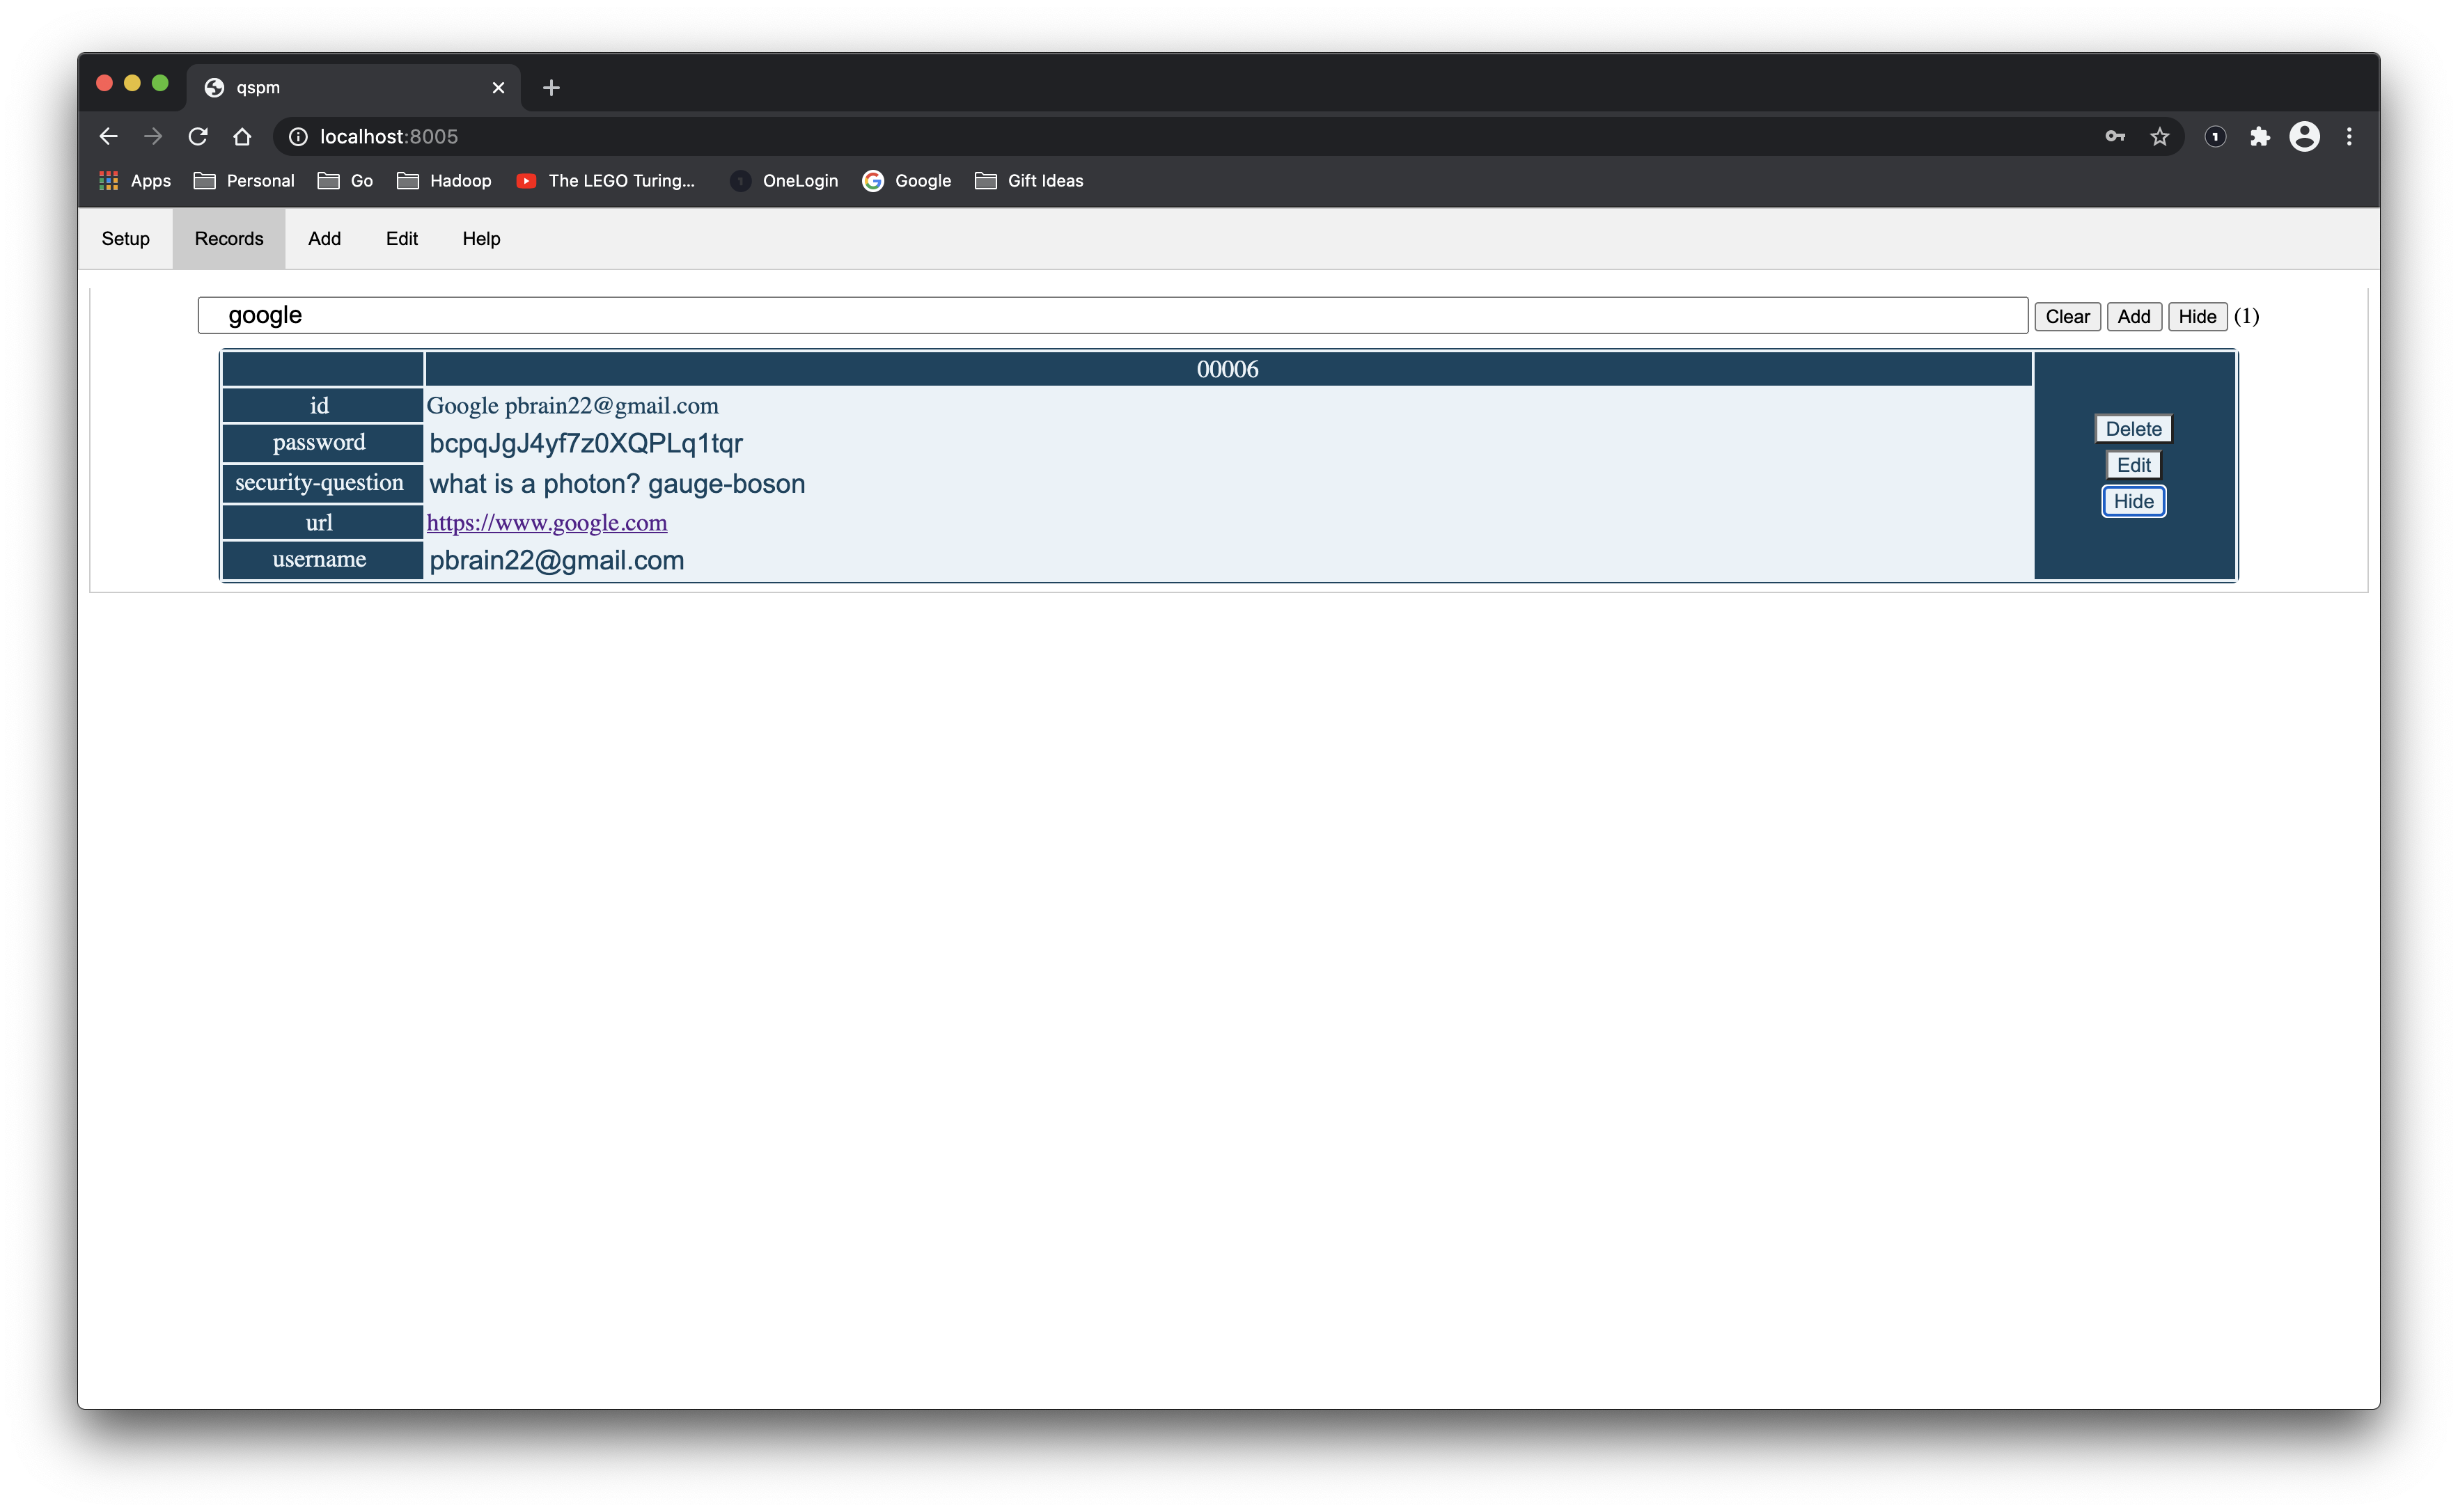
Records are viewed in Records tab. There is a powerful search/filter feature that you can use to prune what you. If you are using the example, try typing google
in the search box to see how it works.
By default all fields that have a case insensitive pass
prefix are hidden. To make them visible, click the Show
button.
All fields that have a case insensitive note
prefix are treated as textarea
fields that allow you to conveniently store notes with multiple lines.
Here is what the records look like if you used the example setup.
Here is what it looks like after typing google
into the search bar.
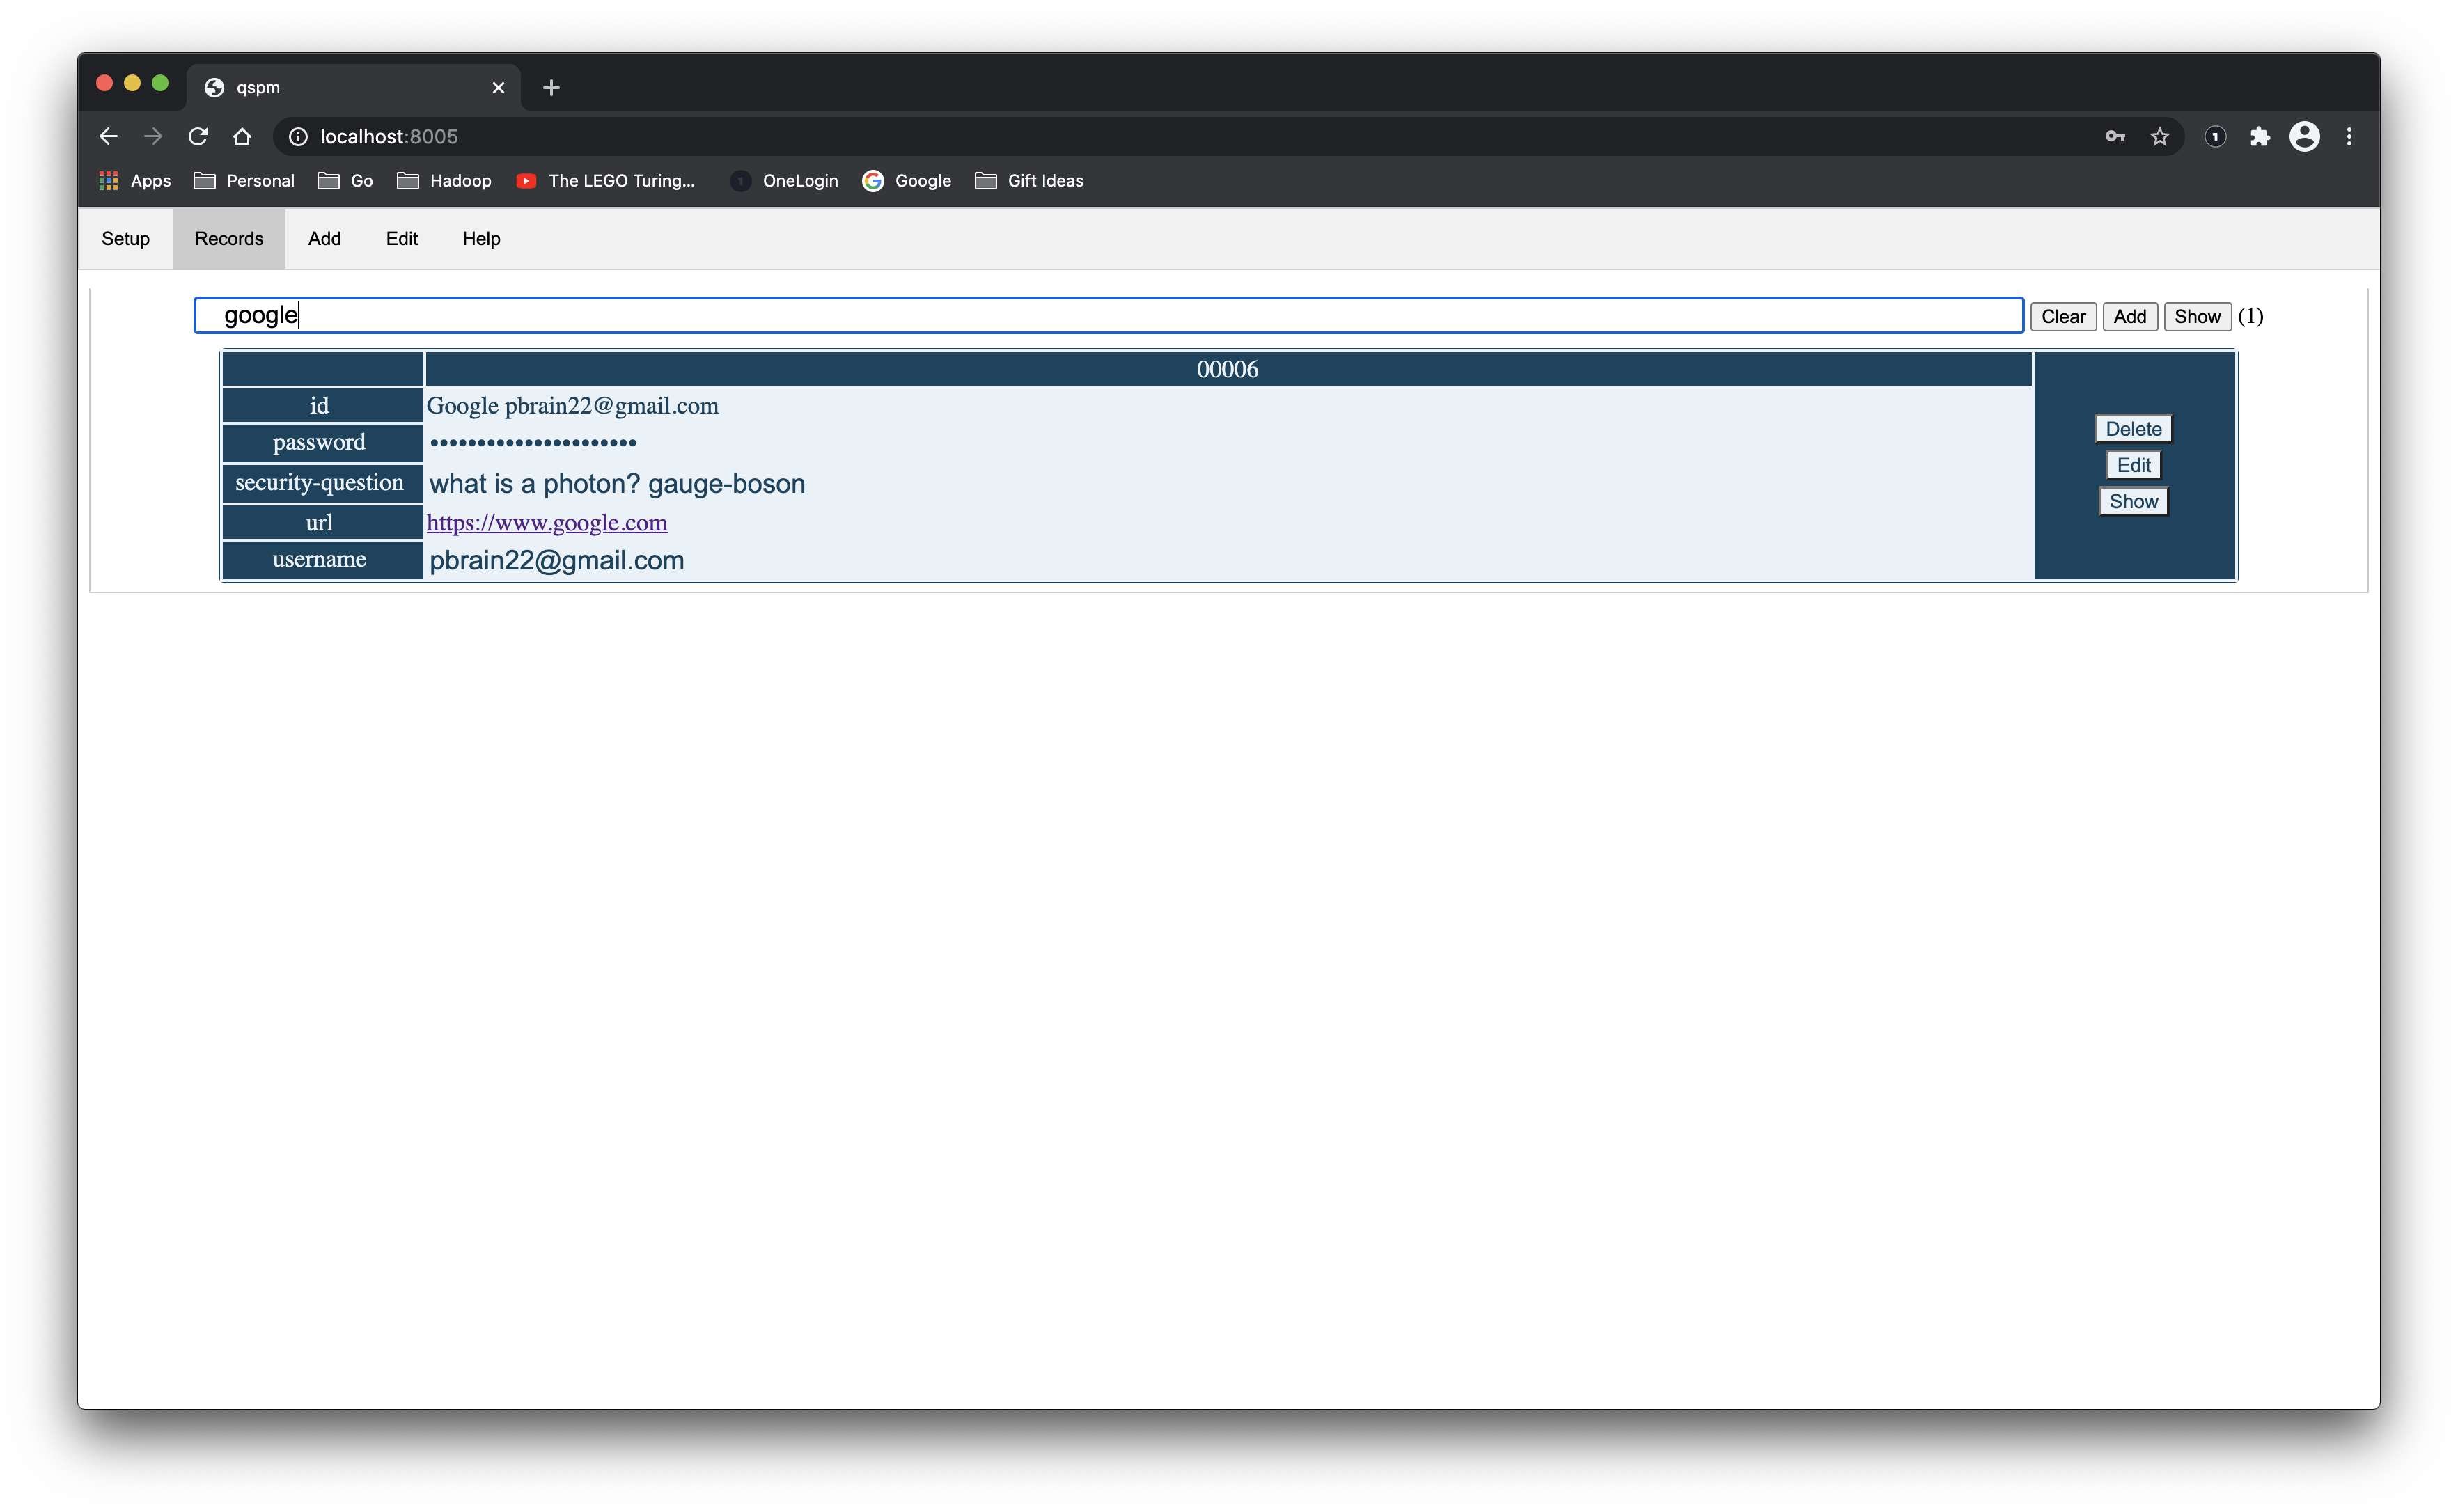
And, finally, this is what it looks like after you click the Show
button.
Records are added in the Records tab or in the Add tab. In the Records, simply click the Add
button at the top.
There is another tricky way to add records, navigate to the Edit tab, choose a record and change the id. This will create a new record and keep the old one.
Records are deleted in the Records tab. Simply click that Delete
button for the record you want to delete. It will pop up a confirmation dialogue to make sure that is what you really want to do.
Records are edited in the Records tab or in the Edit tab. In the Records, simply click that Edit
button for the record.
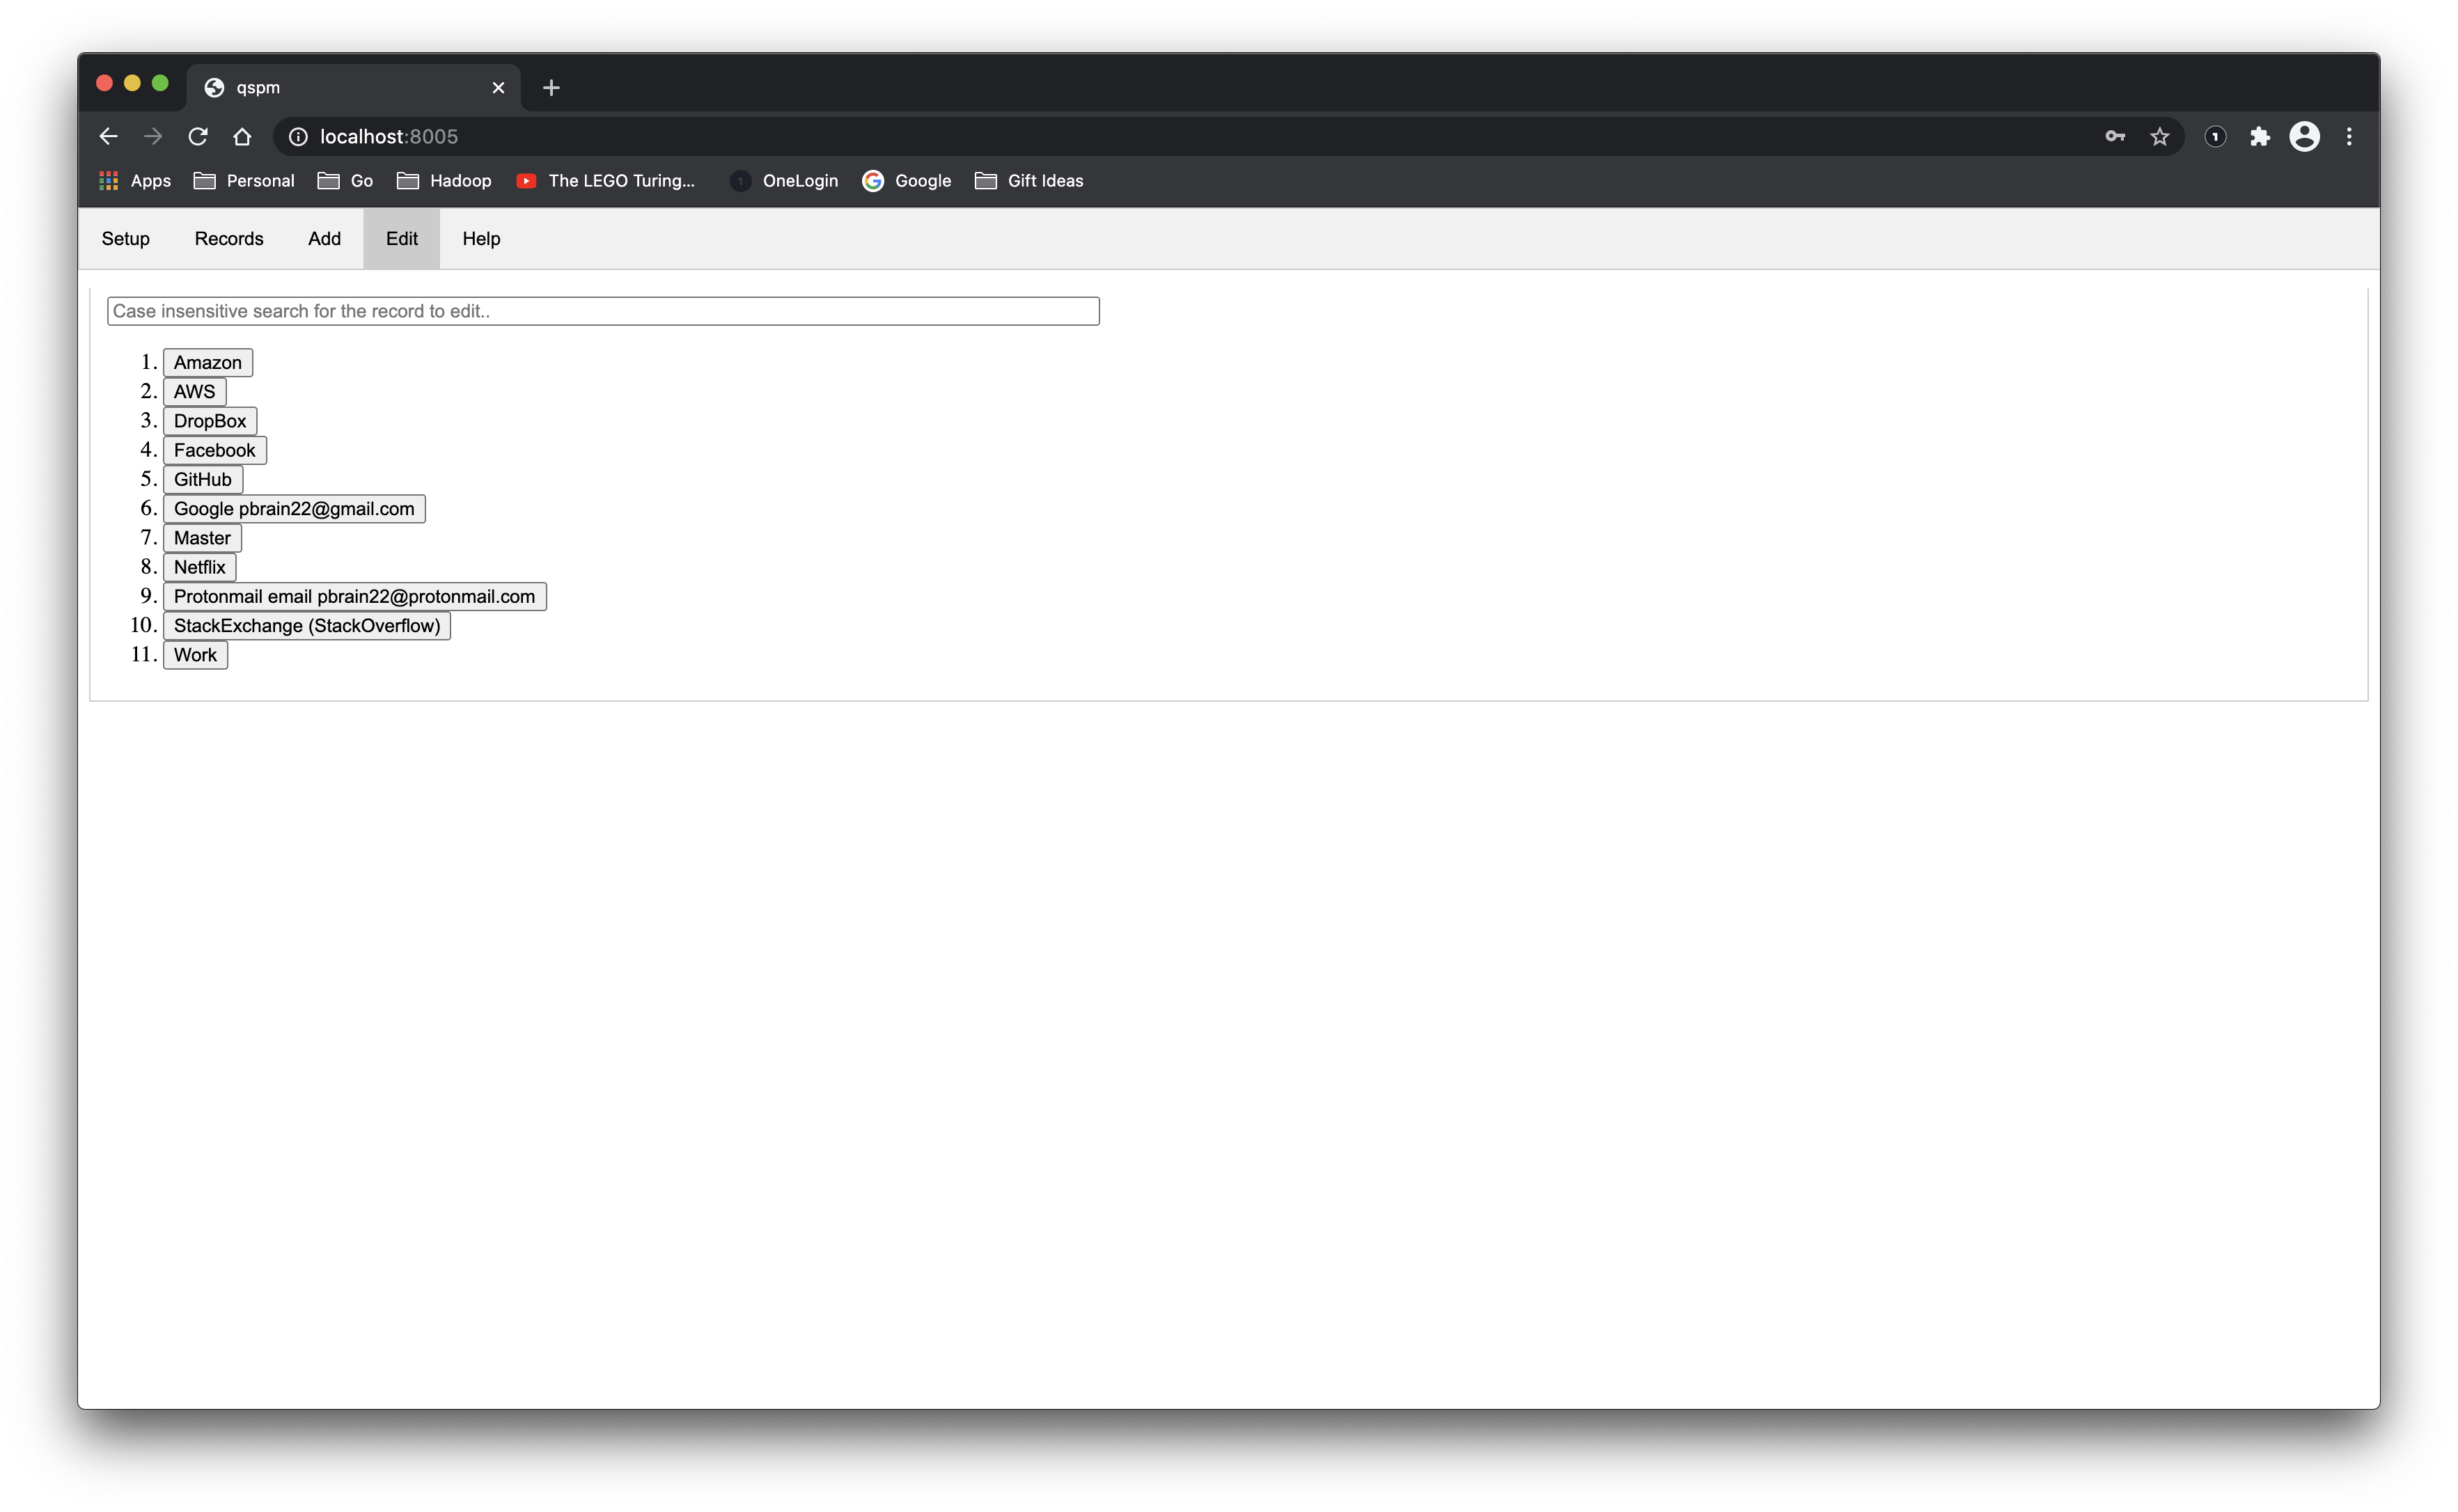
If you go directly to the Edit
tab, you will see all of the records as buttons labeled by their ids. Click on the one you want to edit. This is also a convenient way to get a summary view. Here is what it looks like for the example:
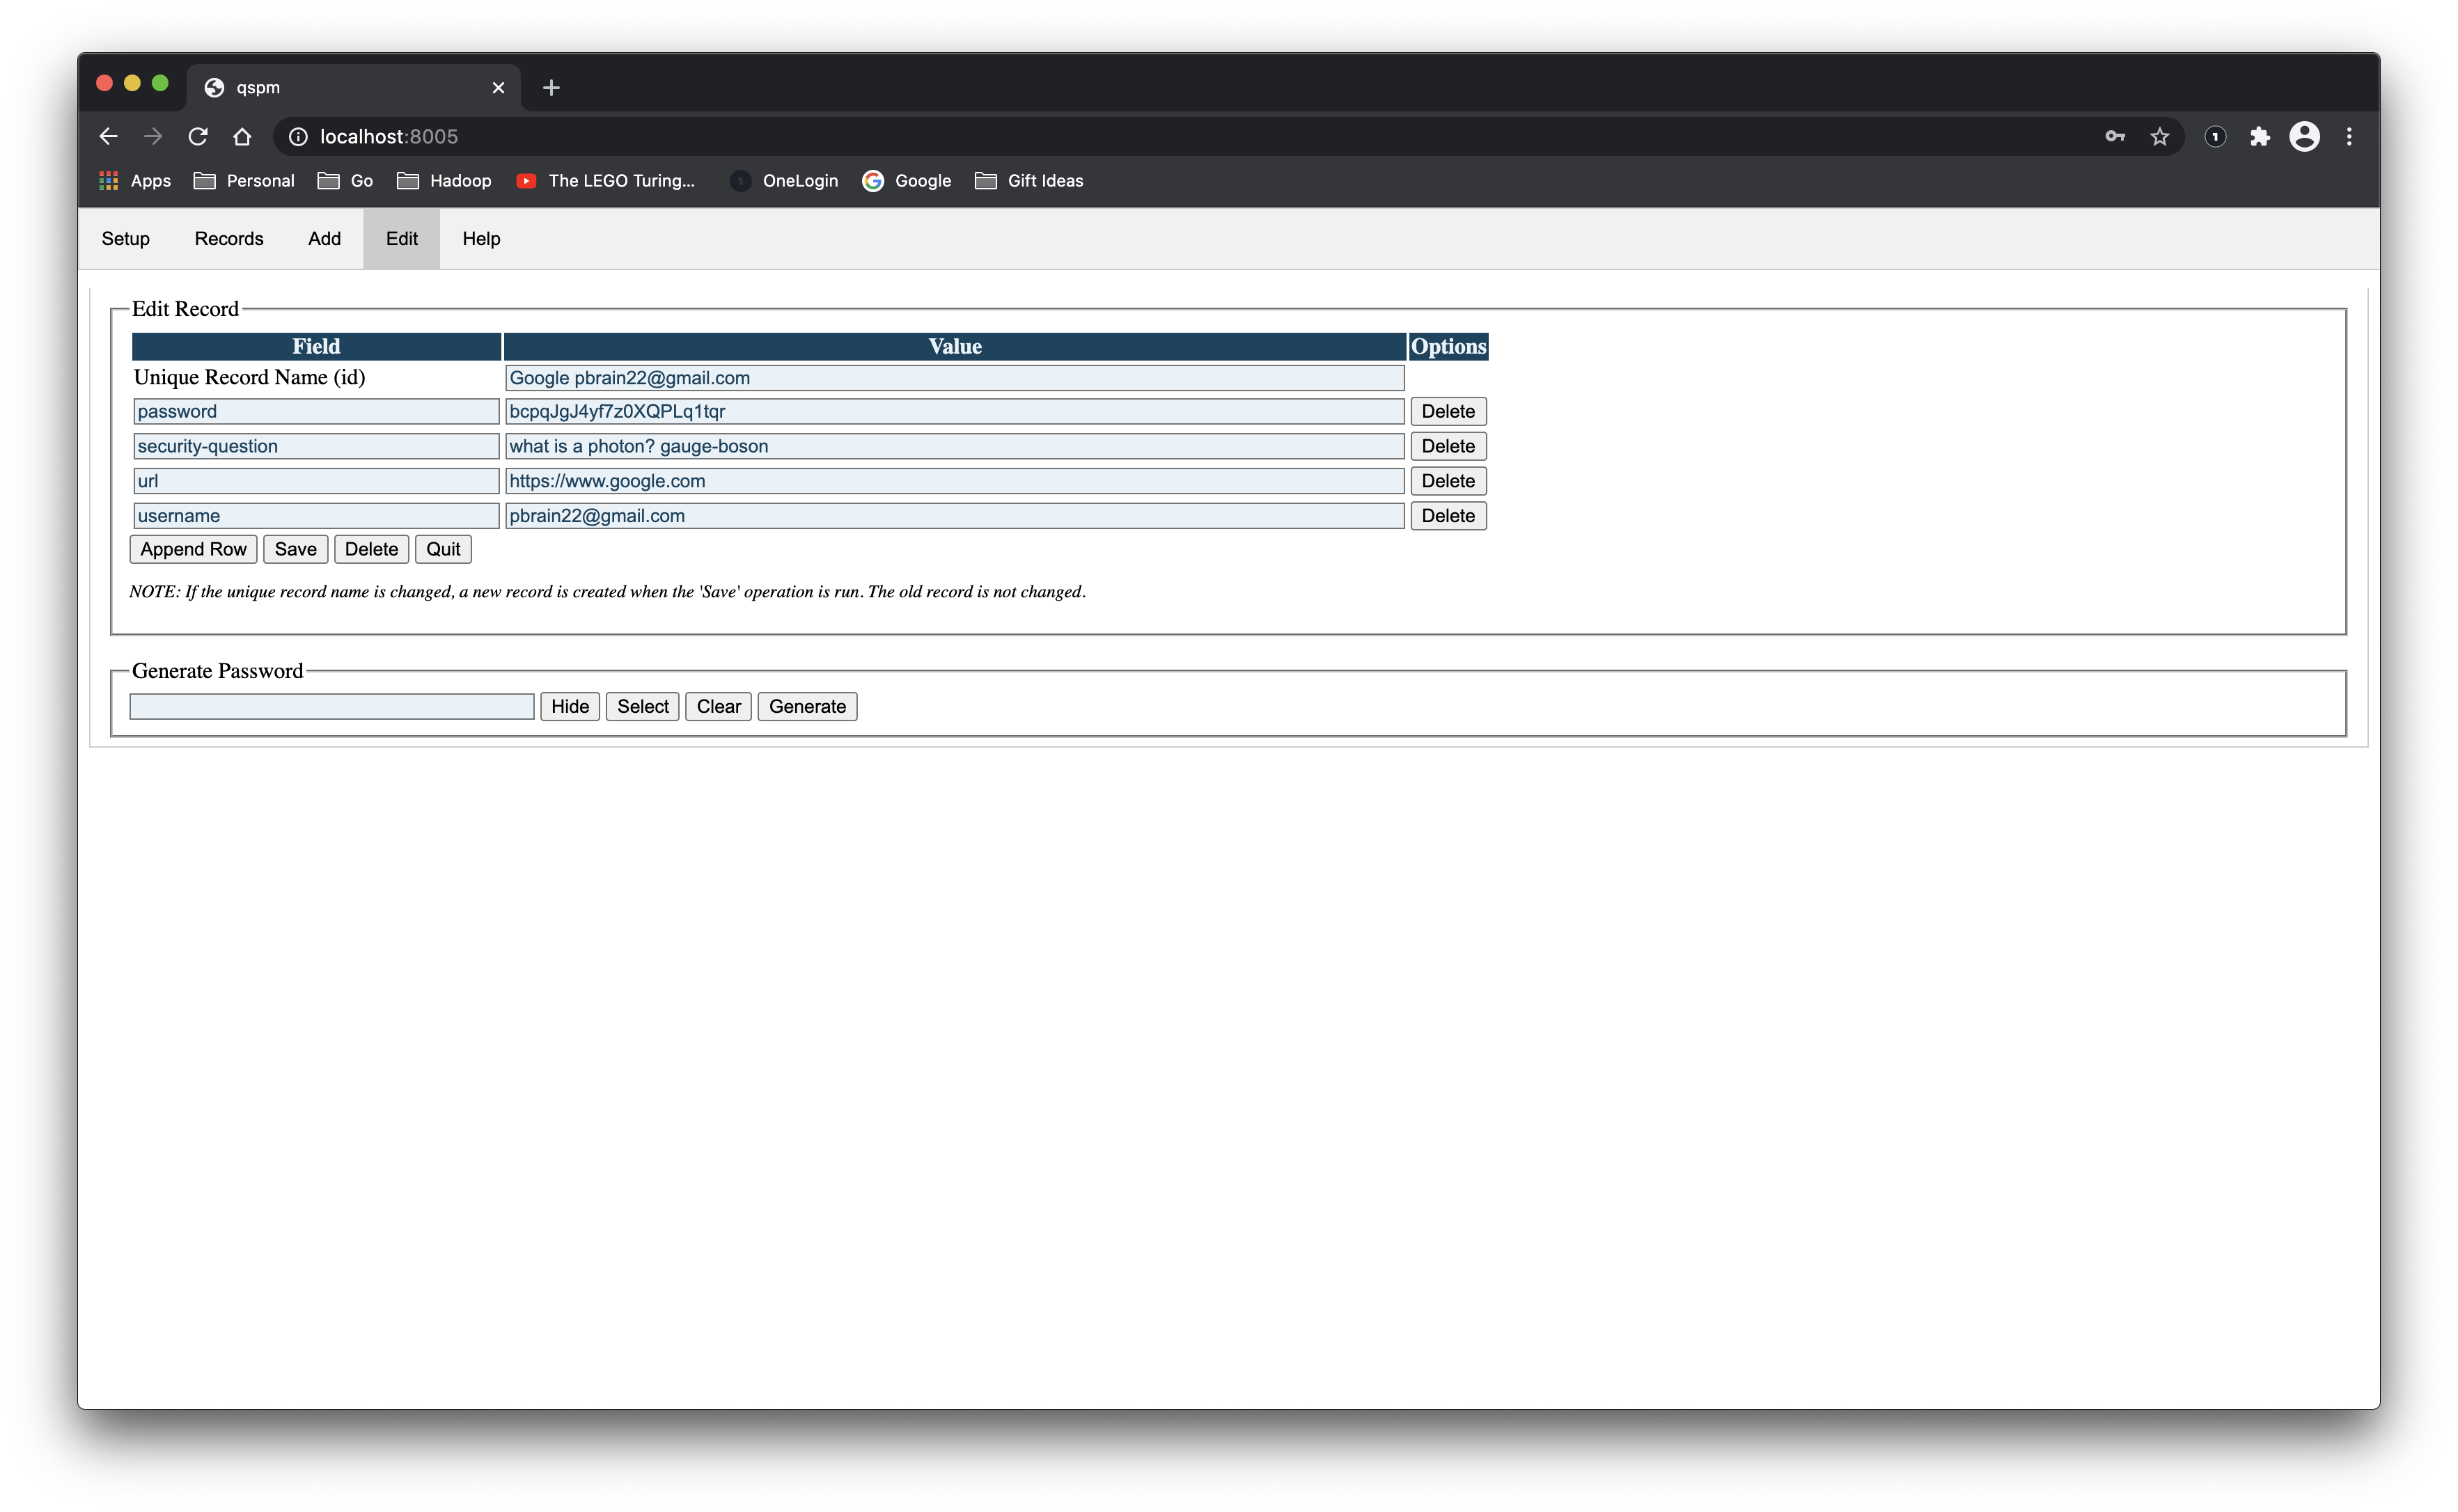
And here is what it looks like after selecting the Google…
button.
The records are stored in JSON format.
There are three sections in the JSON file: meta
, fields
and records
.
The meta
section contains meta data about the records, specifically:
| Field | Description |
|---|---|
| atime | The last access time. |
| ctime | The creation time. |
| mtime | The modification time. |
| version | The schema version. |
All of the time fields are set automatically by the system.
Here is an example:
{
    "meta": {
        "atime": "",
        "ctime": "",
        "mtime": "",
        "version": "0.1.0"
    }
}The fields
section contains meta data about each field of a record. The fields are designated by their id. There are two types of fields meta data:
| Field | Description |
|---|---|
| attrs | CSS attributes for each field with the specified name . Normally things like: {"style": "text-align:right"}. |
| class | CSS class name for each field with the specified name. |
Here is an example:
{
    "fields": {
        "password": {
            "style": "text-align:right;color:red;background-color:blue"
        }
    }
}
NOTE: do not use the above color scheme for real data!
The records
section is a dictionary of records with field entries. The fields in each record do not have to be the same nor do the fields have to be defined in the fields
section. If they are not defined in the fields section then default formatting is applied to them.
Any record that starts with http:
or https:
is assumed to be linkable. All fields in the records report can be selected with a single click unless they are linkable by the previous definition.
Any record that starts with pass
is assumed to be some sort of password field and is hidden by default but you can change that by clicking the Show button.
This is how i lint the javascript code. There are a lot of possible tools for running the lint so i chose not to hard code a single approach.
This is how i installed a linter.
$ npm init
.
.
$ npx eslint --init
.
.
npx: installed 113 in 9.348s
✔ How would you like to use ESLint? · problems
✔ What type of modules does your project use? · esm
✔ Which framework does your project use? · none
✔ Does your project use TypeScript? · No / Yes
✔ Where does your code run? · browser
✔ What format do you want your config file to be in? · JavaScript
Local ESLint installation not found.
The config that you've selected requires the following dependencies:

eslint@latest
✔ Would you like to install them now with npm? · No / Yes
Installing eslint@latest
npm notice created a lockfile as package-lock.json. You should commit this file.
+ eslint@7.17.0
added 113 packages from 65 contributors and audited 113 packages in 12.733s

13 packages are looking for funding
  run `npm fund` for details

found 0 vulnerabilities

Successfully created .eslintrc.js file in /Volumes/extra01/work/qspm
ESLint was installed locally. We recommend using this local copy instead of your globally-installed copy.Here is how i run lint.
$ npx eslint www/js

/Volumes/extra01/work/qspm/www/js/add.js
  108:10  warning  'addAppendTableRowAction' is defined but never used  no-unused-vars
  149:10  warning  'addClearFields' is defined but never used           no-unused-vars
  157:10  warning  'addSaveRecord' is defined but never used            no-unused-vars

/Volumes/extra01/work/qspm/www/js/edit.js
  220:10  warning  'editAppendTableRowAction' is defined but never used  no-unused-vars
  273:10  warning  'editDeleteRow' is defined but never used             no-unused-vars
  287:10  warning  'editSaveRecord' is defined but never used            no-unused-vars
  349:10  warning  'editDeleteRecord' is defined but never used          no-unused-vars

/Volumes/extra01/work/qspm/www/js/records.js
  259:10  warning  'clearRecordsSearch' is defined but never used      no-unused-vars
  266:10  warning  'toggleRecordsPasswords' is defined but never used  no-unused-vars
  342:10  warning  'deleteRecord' is defined but never used            no-unused-vars
  358:10  warning  'addRecord' is defined but never used               no-unused-vars
  372:10  warning  'editRecord' is defined but never used              no-unused-vars

/Volumes/extra01/work/qspm/www/js/tabs.js
  3:10  warning  'openTab' is defined but never used  no-unused-vars

/Volumes/extra01/work/qspm/www/js/utils.js
  19:10  warning  'utilSetSessionKey' is defined but never used     no-unused-vars
  53:10  warning  'utilButtonClearValue' is defined but never used  no-unused-vars

✖ 15 problems (0 errors, 15 warnings)
Note that the
never usedmessage is being applied to functions that i know are called from the HTML.